
Key Takeaways
- Superior Build Quality: Yoder Grills are renowned for their heavy-duty construction and exceptional heat retention, making them a popular choice among serious grill enthusiasts and pitmasters.
- Versatile Cooking Options: From searing steaks to slow-smoking ribs, Yoder Grills offer a wide range of cooking techniques, making them suitable for both beginners and seasoned pros.
- Essential Preparation Steps: Properly prepping your Yoder Grill and meat, including cleaning, seasoning, and temperature control, is crucial for achieving perfect grilling results.
- Smoking and Grilling Techniques: Follow specific guidelines for smoking and grilling to ensure your meat is flavorful, tender, and cooked to perfection using your Yoder Grill.
- Serving Suggestions: Enhance your grilled dishes with creative presentation tips and complementary side dishes such as grilled vegetables, creamy coleslaw, and cornbread to impress your guests.
Ingredients
Gather your ingredients to make the most out of your Yoder Grill experience. Here’s what you’ll need:
For the Meat
- 4 lbs Beef Brisket: Trimmed and ready for the grill
- 2 lbs Pork Ribs: Cut into individual ribs
- 4 Whole Chicken Breasts: Skin-on and bone-in
For the Rub
- 1/4 Cup Brown Sugar
- 2 Tbsp Paprika
- 1 Tbsp Coarse Salt
- 1 Tbsp Black Pepper
- 1 Tbsp Garlic Powder
- 1 Tbsp Onion Powder
- 1/2 Tbsp Cayenne Pepper: Adjust to taste if you prefer more heat
- 1/2 Tbsp Cumin
- Yoder Grill: Ensure it is clean and ready for use
- Wood Chips: Hickory or applewood for that authentic smoke flavor
- Meat Thermometer: For checking internal temperatures
- Grill Tongs: For flipping and removing meat
- Basting Brush: For applying sauces and marinades
- Aluminum Foil: For wrapping and resting meat
By having these ingredients and tools ready, you ensure a smooth and enjoyable grilling experience.
Preparations
Before getting your grub on, it’s crucial to prepare your Yoder Grill and meat properly. Here’s a step-by-step guide.
Prepping the Yoder Grill
- Clean the Grill Grates: Start by scrubbing off any residue from previous grilling sessions using a grill brush. Clean grates ensure those beautiful grill marks and prevent unwanted flavors.
- Fuel the Firebox: Fill the firebox with your choice of wood chips or charcoal. Using a mix of woods such as hickory or oak can enhance the smoky flavor.
- Light the Firebox: Light the firebox using a chimney starter or lighter cubes. Allow the flames to catch and burn for 10-15 minutes until the coals are glowing bright red.
- Set the Temperature: Adjust the vents and dampers to control airflow, aiming for a consistent temperature based on your cooking plans. For low-and-slow smoking, maintain around 225°F to 250°F.
- Season the Grill: If it’s your grill’s maiden voyage or it hasn’t been used in a while, season it with a light coat of cooking oil on the grates to prevent sticking and improve flavor.
Preparing the Meat
- Select Quality Cuts: Choose fresh, high-quality meats such as beef brisket, pork ribs, or chicken breasts. Fresh meat typically yields better flavor and texture.
- Trim Excess Fat: Trim any excess fat from your cuts of meat to prevent flare-ups and ensure even cooking. Leave a thin layer to keep the meat moist and flavorful.
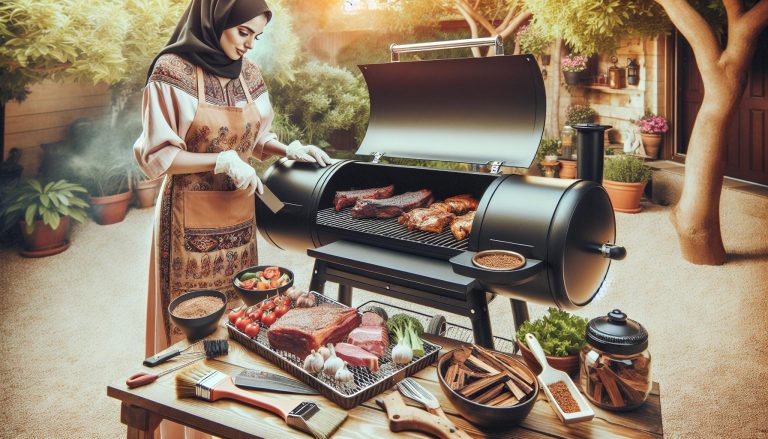
- Apply the Rub: Generously coat your meat with a rub mixture. Massage the rub into the meat, ensuring it gets into all the nooks and crannies. You can prepare your rub or use a premade one.
- Rest the Meat: Let the meat sit at room temperature for 30-45 minutes. This allows the rub to penetrate and enhances the meat’s flavor.
- Preheat the Smoker Box: Before adding the meat, ensure the smoker box is preheated and smoking correctly. You can add wood chips or chunks to generate that rich, smoky flavor.
- Arrange Tools: Lay out your essential grilling tools—grill tongs, a meat thermometer, a basting brush, and a basting sauce. Having tools within reach speeds up the cooking process.
- Prepare an Aluminum Foil Wrap: Have aluminum foil ready for wrapping meats post-cooking. Wrapping helps keep the juices intact during resting.
- Set Up a Meat Thermometer: Place the meat thermometer in the thickest part of your meat. It’s the key to avoiding over or undercooking.
- Organize Your Basting Area: Fill a bowl with your favorite basting sauce and set it in a safe spot near the grill. A small brush will help apply the sauce evenly.
- Keep a Spray Bottle Handy: Fill a spray bottle with apple juice or vinegar to spritz the meat occasionally. This helps in developing a flavorful, moist bark.
With everything prepped, you’re ready to showcase your grilling prowess using your Yoder Grill.
Smoking Instructions

Smoking with a Yoder Grill takes your barbecue game to the next level. Follow these steps to ensure your meat is smoked to perfection.
Prepping the Yoder Grill for Smoking
- Clean the Grill: Make sure all the grates are clean. Remove any residue from previous grilling sessions to avoid flavor contamination.
- Fuel the Firebox: Fill the firebox with your choice of wood pellets or chunks. Hickory, mesquite, and applewood are excellent choices for imparting rich, smoky flavors.
- Set the Temperature: Preheat your Yoder Grill to 225°F for optimal smoking. This low and slow method ensures tender, flavorful meat.
- Seasoning the Grill: Before adding the meat, you can season the grill by applying a thin layer of oil to the grates. This helps prevent sticking and adds a touch of extra flavor.
Smoking the Meat
- Select Quality Cuts: Choose meats that are ideal for smoking, such as brisket, pork shoulder, or ribs.
- Trim Excess Fat: Trim off any excess fat from the meat to allow the smoke to penetrate better.
- Apply a Rub: Generously apply your favorite dry rub to all sides of the meat, ensuring even coating.
- Place the Meat: Carefully place the meat on the grill grates. Ensure there is enough space between pieces for even smoke circulation.
- Add a Water Pan: Place a water pan inside the smoker. This helps maintain moisture and stabilize the temperature.
- Use a Meat Thermometer: Insert a meat thermometer into the thickest part of the meat. This will help you monitor the internal temperature without opening the grill frequently.
- Maintain Consistent Heat: Check and adjust the temperature every hour. Ensure it remains steady at 225°F to 250°F throughout the smoking process.
- Adjust Ventilation: Use the top and bottom dampers to control airflow and maintain consistent temperature. More airflow increases the temperature, while less airflow decreases it.
- Baste the Meat: Periodically baste the meat or spritz it with a spray bottle filled with water, apple juice, or vinegar to keep it moist.
- Monitor Smoke Levels: Aim for a thin, blue smoke. Too much thick, white smoke can result in a bitter flavor.
By following these smoking instructions, you’ll achieve a delicious, smoky flavor in every bite with your Yoder Grill.
Grilling Instructions
You’ve done the prep work, set the temperature, and now it’s time to get grilling. Follow these steps to create mouthwatering dishes on your Yoder Grill.
Grilling Vegetables or Sides
- Select Your Veggies: Choose a variety of vegetables like bell peppers, zucchini, asparagus, and corn.
- Prep the Vegetables: Rinse thoroughly. Cut vegetables into even-sized pieces to ensure they cook uniformly.
- Season Generously: Drizzle with olive oil. Season with salt, pepper, and your favorite herbs. Toss to coat evenly.
- Preheat the Grill: Set your Yoder Grill to medium-high heat, around 375°F.
- Use Grill Baskets or Skewers: For smaller veggies, use a grill basket to prevent them from falling through the grates. You can also skewer them for easy turning.
- Grill, Turn, Repeat: Place vegetables on the grill. Turn occasionally to achieve a nice char and cook evenly. Most vegetables are done in 10-15 minutes.
- Serve Immediately: Remove from the grill and serve hot. Drizzle with a little more olive oil or a squeeze of lemon juice for added flavor.
- Start Low and Slow: For larger cuts of meat like brisket or pork shoulder, begin by smoking them at a lower temperature (around 225°F) to infuse flavor and cook through.
- Crank Up the Heat: Once your meat reaches an internal temperature of 180°F, increase the grill temperature to 400°F to finish cooking.
- Sear to Perfection: Place the meat over direct heat. Sear each side for a few minutes to form a flavorful crust. Keep an eye on it to avoid burning.
- Use a Meat Thermometer: Ensure the internal temperature reaches the desired doneness. For beef, aim for 135°F for medium-rare, 145°F for medium, and 160°F for well done. For pork, 145°F is perfect.
- Rest the Meat: Transfer the meat to a cutting board. Let it rest for 10-15 minutes to allow juices to redistribute.
- Slice and Serve: Slice against the grain for maximum tenderness. Serve hot with your favorite sauces and sides.
Following these instructions ensures every bite is packed with flavor, making your Yoder Grill the star of any gathering.
Serving Suggestions
Once you’ve mastered the art of grilling with your Yoder Grill, it’s time to elevate your dish with impeccable presentation and perfect pairings. Here are some tips to make your grilled creations even more delightful.
Presentation Tips
- Slice Against the Grain
When serving meats like brisket or steak, slice against the grain to ensure tenderness. This simple trick will make each bite more enjoyable. - Use Garnishes
Fresh herbs such as parsley, cilantro, or rosemary not only add color but also a hint of fresh aroma that complements the smokiness of your grilled dishes. - Keep it Organized
Arrange your meats and sides in a visually appealing manner. Use contrasting colors and textures to make the plate look inviting. For example, place a slice of bright red tomato beside your perfectly grilled steak. - Serve Hot and Fresh
Ensure your meats are served hot. Use pre-warmed plates to keep your food at the perfect temperature longer.
- Grilled Vegetables
Pair your smoky meats with grilled vegetables such as asparagus, bell peppers, and zucchini. The char from the grill adds a delicious depth of flavor to the veggies. - Creamy Coleslaw
A cold, creamy coleslaw provides a refreshing contrast to the rich, smoky meat. It adds a crunchy texture that complements the softness of slow-cooked meat. - Baked Beans
Opt for baked beans with a hint of sweetness. The beans’ savory and sweet profile works beautifully with smoked and grilled dishes. - Cornbread
A slice of cornbread adds a touch of classic Southern comfort to your barbecue plate. Its slight sweetness balances the savory elements of your grilled meats. - Potato Salad
Choose a potato salad with a tangy vinaigrette or a creamy mayo base to add another layer of flavor. The potatoes’ texture can make your meal more filling and satisfying.
Following these serving suggestions will ensure that your Yoder Grill creations are always a hit, leaving your guests impressed and coming back for more.
How Can Yoder Grills Enhance Outdoor Barbecue Safety and Perfect Grilling?
Yoder Grills are designed with precision engineering to enhance outdoor barbecue safety through sturdy construction and reliable temperature control. Their advanced features make achieving ideal results effortless. For enthusiasts seeking flawless grilling, Yoder Grills combine innovation and durability, ensuring “perfect grilling tips” come to life with every cookout session.
Conclusion
Yoder Grills offer unmatched craftsmanship and performance, making your grilling experience exceptional. By following the steps for preparation, smoking, and grilling, you can achieve mouth-watering results every time. Don’t forget the importance of presentation and pairing your grilled meats with complementary sides like coleslaw and cornbread. With these tips, you’re sure to impress your guests and elevate your outdoor cooking game. Happy grilling!
Frequently Asked Questions
What initial preparations are needed before grilling with a Yoder Grill?
Before grilling with a Yoder Grill, you should clean the grill, fuel it appropriately, and season it. Additionally, choosing quality cuts of meat is essential for the best results.
How do I season a Yoder Grill?
Seasoning your Yoder Grill involves coating the grates with oil and heating it to create a non-stick surface that enhances flavor and prevents rusting.
What steps are essential for smoking meat on a Yoder Grill?
Essential steps for smoking meat include prepping the meat, monitoring the grill’s temperature, and basting the meat during the smoking process to keep it moist and flavorful.
How should I grill vegetables on a Yoder Grill?
Grill vegetables by cutting them into uniform pieces, lightly oiling them, and placing them on the grill over medium heat until they are tender and have nice grill marks.
What are some tips for grilling larger cuts of meat?
For grilling larger cuts of meat, use indirect heat, monitor the internal temperature with a meat thermometer, and allow the meat to rest before slicing to retain juices.
How should I slice meat to serve?
Always slice meat against the grain. This makes the meat easier to chew and ensures each bite is tender.
What are some good garnishes to use when serving grilled meats?
Good garnishes for grilled meats include fresh herbs like parsley or cilantro, lemon or lime wedges, and a sprinkle of coarse sea salt or freshly cracked black pepper for added flavor.
How should I organize plates for serving grilled meals?
Organize plates by placing the main protein in the center, vegetables to one side, and side dishes like coleslaw or potato salad neatly alongside. This presentation helps balance the plate visually and gastronomically.
Why is it important to serve grilled meats hot?
Serving grilled meats hot is crucial because it ensures the best texture and flavor. Cold meats can become tough and lose their juicy quality.
What are the best side dishes to pair with grilled meats?
Great side dishes to pair with grilled meats include grilled vegetables, coleslaw, baked beans, cornbread, and potato salad. These sides complement the smokiness of the grilled meats and enhance the overall dining experience.