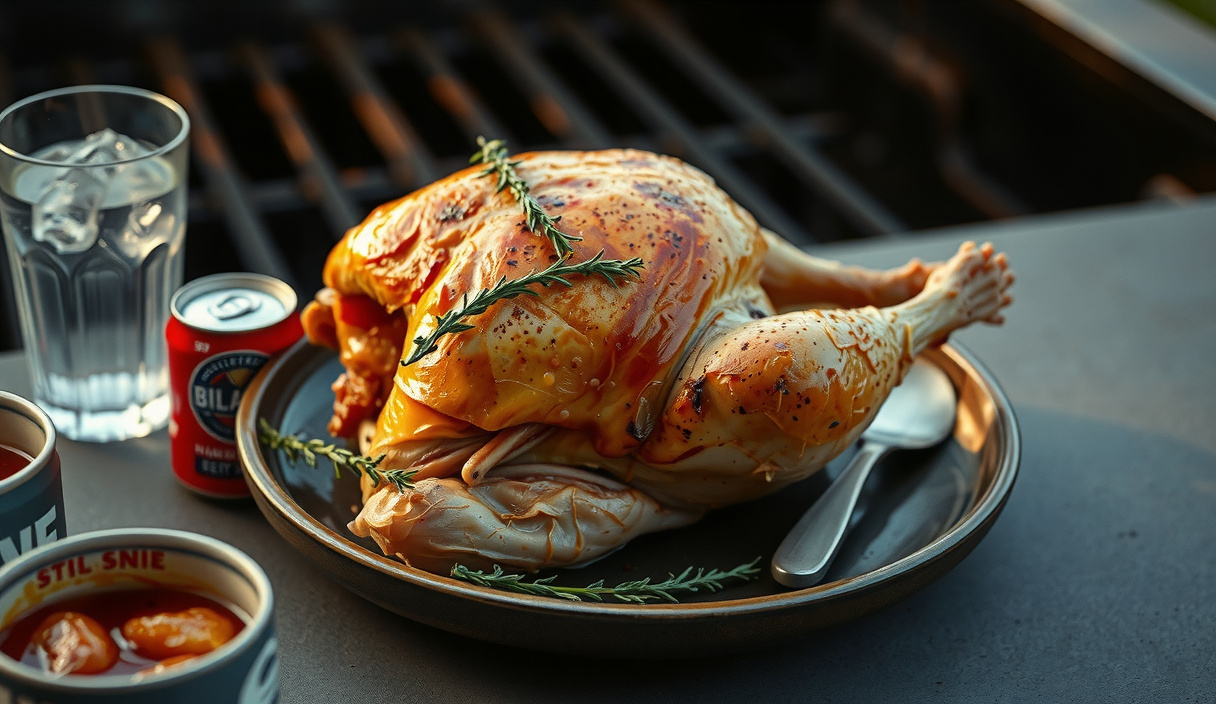
Beer-Can Chicken on the Grill
A whole chicken dry-brined for 24 hours, mounted on a half-full beer can, and roasted upright over indirect heat at 350°F until the skin shatters and the meat stays remarkably juicy. The beer provides cavity steam that slows interior moisture loss; the baking powder in the rub builds a crackled, deeply browned crust via Maillard chemistry. Straightforward technique, exceptional results.
Equipment
- 1 Charcoal or gas grill (22-inch kettle preferred) Set up for two-zone indirect heat at 350°F. Bank coals to both sides of a drip pan, or light flanking gas burners only.
- 1 Disposable aluminum drip pan Placed in the center of the grill under the bird to catch drippings and prevent flare-ups.
- 1 Instant-read thermometer Essential for pulling the bird at the correct 160°F breast internal temperature. A Thermapen or similar probe thermometer is ideal.
- 1 Standard 12-oz beer can (or vertical poultry roaster) Half-filled before cooking. A stainless vertical poultry roaster is a cleaner, purpose-built alternative.
- 1 Wire rack set inside a rimmed sheet pan For the 24-hour uncovered dry brine in the refrigerator. Airflow under the bird is critical for pellicle formation.
Ingredients
The Chicken
- 1 whole chicken, 3.5 to 4.5 pounds Pat completely dry inside and out with paper towels before applying the dry brine.
Dry Brine Rub
- 2 tsp Diamond Crystal kosher salt Use 0.5 tsp per pound of chicken. For Morton kosher salt, reduce to 1.25 tsp total — Morton's flakes are denser.
- 1 tsp baking powder Aluminum-free preferred. Raises skin pH to accelerate Maillard browning and create micro-blistered crust texture.
- 1 tsp smoked paprika
- 1 tsp garlic powder
- 1 tsp onion powder
- 0.5 tsp freshly ground black pepper
- 0.5 tsp dried thyme
- 0.25 tsp cayenne pepper Optional. Omit for a milder profile.
The Can
- 1 12-oz can lager or pilsner beer Drink or pour out half the beer before cooking. Low-sodium chicken broth is a fully effective non-alcoholic substitute.
Optional Aromatics for the Can
- 2 cloves garlic, smashed
- 1 sprig fresh thyme or rosemary

Instructions
24 Hours Before: Dry Brine
- Remove the chicken from its packaging and pat it completely dry with paper towels — exterior skin, interior cavity, every surface. Moisture on the skin at this stage defeats the osmotic draw of the dry brine and delays pellicle formation.
- In a small bowl, combine the kosher salt, baking powder, smoked paprika, garlic powder, onion powder, black pepper, dried thyme, and cayenne (if using). Stir thoroughly to distribute the baking powder evenly — clumping will create uneven browning.1 tsp baking powder, 1 tsp smoked paprika, 1 tsp garlic powder, 1 tsp onion powder, 0.5 tsp freshly ground black pepper, 0.5 tsp dried thyme, 0.25 tsp cayenne pepper
- Rub the spice mixture all over the bird: under the breast skin (gently loosen it with your fingers), over the thighs, drumsticks, wings, and inside the cavity. Apply about 60% of the rub to the skin surfaces you want to brown most aggressively — the breast top and thighs. Set the chicken breast-side up on a wire rack set over a rimmed sheet pan.1 tsp baking powder, 1 tsp smoked paprika, 1 tsp garlic powder, 1 tsp onion powder, 0.5 tsp freshly ground black pepper, 0.5 tsp dried thyme, 0.25 tsp cayenne pepper
- Refrigerate uncovered for 24 hours (minimum 8 hours, maximum 48 hours). The initial surface moisture will be drawn out by osmosis in the first 2 hours, then reabsorbed. By hour 12 to 24, the skin will be visibly dry and slightly tacky — that is the pellicle. This surface is what browns and crisps on the grill.
Set Up the Grill
- Remove the chicken from the refrigerator 30 minutes before grilling. While it tempers, prepare your grill. Charcoal kettle: Light a full chimney of charcoal (about 90 briquettes or 80 hardwood charcoal pieces). When ashed over, bank the coals evenly to both sides of the kettle and place a disposable drip pan in the center. Replace the grill grate. Gas grill: Preheat with all burners on high for 10 minutes, then turn off center burners and reduce outer burners to medium-low. Place a drip pan over the unlit center burners. Target 350°F at lid level.
Mount the Bird and Grill
- Open the beer can. Drink or pour out approximately half (6 ounces). If using aromatics, drop the smashed garlic cloves and herb sprig into the can now. If substituting chicken broth, fill a clean can or vertical roaster reservoir halfway.1 12-oz can lager or pilsner beer, 2 cloves garlic, smashed, 1 sprig fresh thyme or rosemary
- Hold the chicken upright — cavity facing down — and lower it onto the beer can so the can enters the cavity and the chicken sits with its legs forming a tripod with the can base. The drumsticks should angle slightly forward, touching the grill grate, to provide a stable three-point stance. Tuck the wing tips behind the bird's back.1 12-oz can lager or pilsner beer
- Carefully transfer the whole assembly — chicken balanced on can — to the center of the grill grate over the drip pan, away from direct heat or flame. The bird should stand completely vertical. If using a gas grill, position the bird between the lit flanking burners.
- Close the grill lid. Maintain 350°F throughout the cook by adjusting vent position (charcoal) or burner level (gas). Cook undisturbed for 45 minutes before your first temperature check.
- At 45 minutes, insert an instant-read thermometer into the thickest part of the breast, parallel to the backbone and well away from bone. If reading below 145°F, close the lid and check every 15 minutes. Pull the bird when the breast reads 160°F. Total grill time is typically 70–90 minutes for a 4-pound bird at consistent 350°F.
Rest and Carve
- Remove the bird carefully. Using heavy tongs and a second pair of hands or a dedicated vertical roaster gripper, tip the entire assembly onto a rimmed sheet pan. Let it rest upright on the can for 10 full minutes, tented loosely with foil. Carryover conduction will bring the breast to 165°F during the rest. The thighs will be 175–185°F — well into the collagen hydrolysis zone for maximum juiciness in dark meat.
- To remove the can: hold the bird steady with tongs and carefully slide the can out from the cavity. The can will be extremely hot and may still contain hot liquid — handle with oven mitts or thick gloves. Discard the can and its contents. Carve the chicken on the sheet pan, separating legs, thighs, wings, and breast halves. Serve immediately.
Notes
Why the dry brine works: Salt draws surface moisture out by osmosis in the first 1–2 hours, then diffuses back into the muscle over hours 3–24, carrying sodium and chloride ions deep into the myofibrillar protein network. These ions disrupt electrostatic bonds in actin and myosin, causing the fibers to swell and hold more water during cooking. The pellicle that forms on the skin surface has reduced water activity (aw) well below 0.70, which is the threshold below which surface evaporation slows enough to allow Maillard browning at grill temperatures.
The baking powder mechanism: Baking powder raises the skin pH from approximately 5.8 toward 6.5–7.0. The Maillard reaction proceeds faster at slightly alkaline pH because the amino groups of surface proteins are more reactive with reducing carbonyl compounds at higher pH. Additionally, as the skin heats past 250°F, residual sodium bicarbonate in the baking powder releases CO₂, generating micro-bubbles that produce the crackled, blistered texture characteristic of restaurant-quality crispy skin.
What the beer actually does: At 350°F grill ambient temperature, the liquid in the can reaches boiling (212°F) within 20–30 minutes and generates a sustained column of water vapor inside the cavity. This vapor slows the evaporative moisture loss from the inner breast wall, buying roughly 8–12 minutes of additional thermal tolerance before the breast protein network contracts severely at the actin denaturation threshold of 74–78°F. The hop-derived terpenes and fermentation esters in beer are highly volatile and substantially cook off at sustained temperatures; flavor contribution to the meat is minimal and largely indistinguishable from plain water vapor in blind tasting.
Temperature targets and protein denaturation: Myosin denaturation begins at ~50°F and completes around 58°F — this is where chicken transitions from translucent to opaque. Sarcoplasmic proteins denature through 67°F. Actin — the structural protein responsible for rubbery, dry texture when overdone — collapses at 74–78°F with an activation energy of ~331 kJ/mol. Holding breast meat at or just below 160°F internal for the 10-minute rest achieves USDA pasteurization without crossing the actin collapse threshold. Dark meat's high collagen content means holding the thighs well above 165°F (targeting 175–185°F) is desirable — extended time above 160–170°F converts tough collagen to soluble gelatin, which is why properly cooked thighs feel succulent rather than dry even at higher temperatures.
Nutrition
Calories: 520kcalCarbohydrates: 2gProtein: 58gFat: 29gSaturated Fat: 8gCholesterol: 195mgSodium: 740mg
Tried this recipe?Let us know how it was!