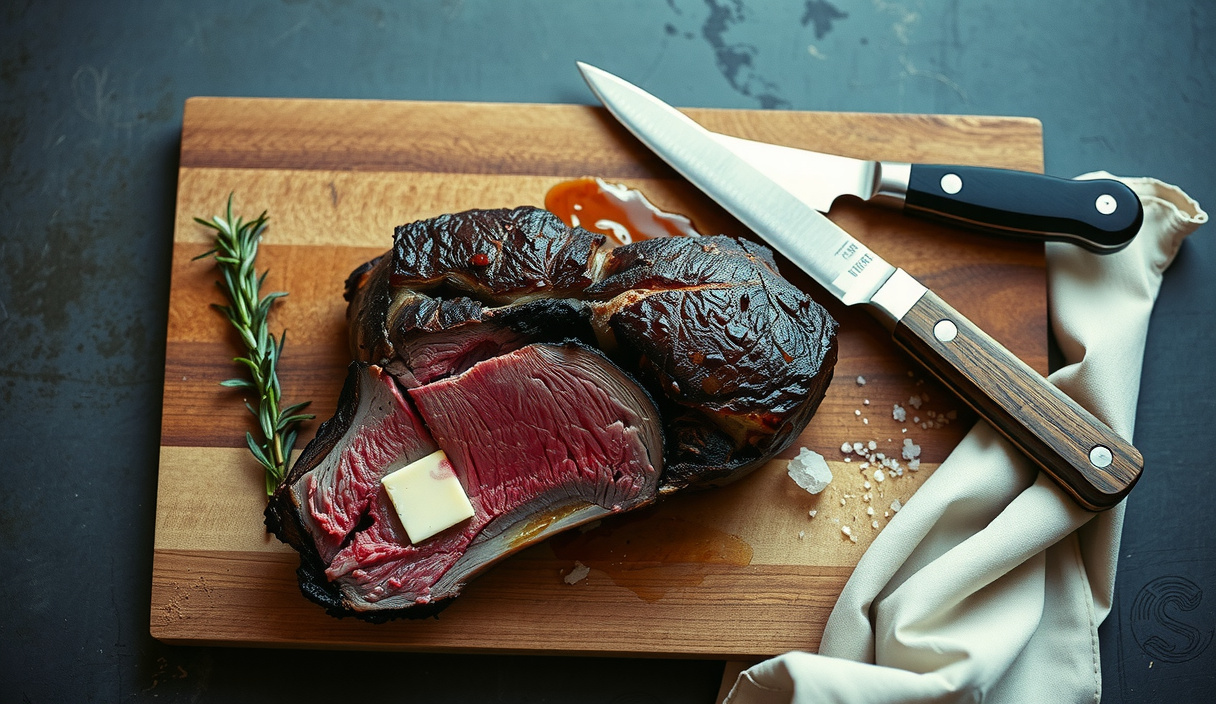
Smoked Prime Rib — Bone-In
A 3-bone, bone-in prime rib dry-brined for 24 hours with kosher salt, smoked low-and-slow at 225°F over oak until 120°F internal, rested 30 minutes, then blasted at 500°F for a crackling bark. Carryover cooking delivers a textbook 130°F medium-rare throughout — no gray band, deep smoke ring, and a crust that shatters when you press it.
Equipment
- 1 Offset smoker or kettle grill with two-zone setup Must hold a stable 225°F indirect ambient temperature. Pellet grill works; add a smoke tube for deeper ring.
- 4 to 6 Oak or post oak wood chunks Chunks, not chips. Split to roughly fist-size for a steady, controlled burn. Cherry or pecan are acceptable substitutes.
- 1 Instant-read probe thermometer Accurate to ±0.5°F. Thermapen or equivalent. A leave-in probe makes monitoring the long smoke hands-free.
- 1 Wire rack set inside a rimmed sheet pan For dry brining in the refrigerator and for the high-heat sear phase.
- 1 Heavy roasting pan or cast iron skillet Preheated in the 500°F oven for the final sear. The residual heat from the hot pan aids in crust formation on the bottom of the roast.
- 4 to 6 lengths Butcher's twine For tying the rib bones back to the roast if the butcher has removed them. The bones act as a natural roasting rack and flavor the meat.
Ingredients
The Roast
- 1 3-bone bone-in prime rib roast, first-cut preferred Approximately 7 to 9 pounds. USDA Prime grade strongly recommended. Ask the butcher to french the bones and tie them back on if removed. Cap on or off is your call — on gives you more rendered fat and a richer bark.
Dry Brine
- 3 tablespoons Diamond Crystal kosher salt Use 2 tablespoons if substituting Morton kosher salt, which has higher crystal density. Approximately 1 teaspoon per pound of meat is the target application rate.
- 2 teaspoons coarse black pepper, freshly cracked Use a coarse grind — 3/16 inch crack setting if you have an adjustable grinder. Fine-ground pepper will blow off in the smoke.
- 1 teaspoon garlic powder Optional but recommended. Adds a Maillard-ready amino acid layer that contributes to bark complexity.
For Serving
- 2 tablespoons flaky sea salt, such as Maldon For finishing at the table. The large crystal size provides a textural contrast to the bark and a clean salinity hit.
- 1 cup prepared horseradish cream Optional. Fresh-grated horseradish in sour cream with a pinch of salt is classic and cuts the richness.
- 1 cup beef au jus or pan drippings Optional. Collect the drippings from the smoke phase, deglaze with beef stock, strain, and reduce by half.

Instructions
24 Hours Before: Dry Brine
- Remove the prime rib from its packaging and pat completely dry with paper towels — surface moisture is the enemy of a good bark, and you want to start the drying process immediately. Set the roast bone-side down on a wire rack placed inside a rimmed sheet pan.
- Combine the kosher salt, cracked black pepper, and garlic powder in a small bowl. Apply the seasoning blend aggressively and evenly to every exposed surface of the roast — top, sides, and the ends of the meat between the bones. Do not season the cut bone surfaces. Press the seasoning firmly into the fat cap so it adheres.2 teaspoons coarse black pepper, freshly cracked, 1 teaspoon garlic powder
- Place the seasoned roast, uncovered, in the refrigerator on the wire rack. Leave it uncovered for the full 24-hour dry brine window. The exposed surface will appear slightly tacky and dry by hour 12 and then begin to look glistening again by hour 24 as the brine draws moisture back out and then diffuses inward. Both stages are correct — do not cover the roast.
Day of Cook: Smoke Phase
- Remove the prime rib from the refrigerator 45 to 60 minutes before the smoke goes on. A cold core extending the cook time is fine — but a refrigerator-cold roast that has been sitting in warm ambient air for only 10 minutes has an artificially low surface temperature and will cause your probe to mislead you in the early phase. Let it temper slightly.
- Fire up your smoker and stabilize it at 225°F with indirect heat. Add oak wood chunks to your heat source. Wait until the smoke runs thin and blue-gray — this indicates clean combustion. White billowing smoke contains unburned creosote compounds that will deposit a bitter, acrid coating on the meat. Do not put the roast on until the smoke is clean.
- Place the prime rib bone-side down on the smoker grate over indirect heat, fat cap up. Insert a leave-in probe thermometer from the cut end of the roast, angling toward the geometric center of the muscle mass. Avoid bone contact and avoid fat pockets — probe placement in pure muscle tissue at the center gives you the most accurate reading of the coolest point in the roast, which is the number you are managing.
- Smoke at 225°F until the internal temperature at the center reads 120°F. On a 7- to 9-pound bone-in prime rib, this will take approximately 5.5 to 7 hours. Do not open the smoker more than necessary — every opening drops ambient temperature and resets the thermal equilibrium of the cook chamber. Add wood chunks as needed to maintain clean, thin smoke throughout. The stall you experience around 110°F to 115°F is normal and brief — the evaporative surface cooling catches up to the internal heat input momentarily. Hold steady at 225°F and it will push through.
Rest Phase
- When the internal temperature reads exactly 120°F, pull the roast off the smoker. Place it bone-side down on a clean wire rack set inside a sheet pan. Do not wrap it tightly in foil — a tight wrap traps steam and destroys the bark you built. Tent it very loosely with a sheet of foil, or simply leave it exposed in a warm corner of the kitchen away from drafts.
- While the roast rests, preheat your oven to 500°F with the heavy roasting pan or a cast iron skillet on the center rack. Let the oven and the pan heat together for at least 20 minutes — the pan must be screaming hot when the roast goes in. This is critical for bark formation on the bottom surface of the roast.
- Rest the roast for exactly 30 minutes. Check the temperature at the center with your instant-read thermometer at the 30-minute mark. It should read between 128°F and 132°F — this is the carryover window. If it is below 126°F, extend the rest by 10 minutes and recheck. If it is above 133°F, move immediately to the sear phase.
Final Sear
- Pat the entire exterior of the roast dry with paper towels. Any moisture on the surface will vaporize before the Maillard reaction begins, delaying crust formation and costing you oven time you do not have at this stage. The surface should feel dry and slightly tacky, not wet.
- Carefully transfer the roast to the preheated roasting pan in the 500°F oven, bone-side down and fat cap up. Do not add oil or additional fat — the rendered surface fat from the brine and smoke phase is sufficient. Sear at 500°F for 8 to 12 minutes, monitoring closely, until the fat cap is deeply browned and the exposed meat surfaces on the ends show a dark mahogany crust. The bark should look almost crackled and dry — not wet or shiny. Check every 2 minutes after the 8-minute mark; the difference between a perfect crust and a burned one is narrow at this temperature.
- Remove the roast from the oven and immediately transfer it to a cutting board — do not let it sit in the hot roasting pan or the bottom will continue to cook. Let it rest on the board for 5 minutes only, then carve and serve immediately. Finish with flaky sea salt at the table.2 tablespoons flaky sea salt, such as Maldon, 1 cup prepared horseradish cream, 1 cup beef au jus or pan drippings
Carving
- To carve: stand the roast upright on its bone-side and slice downward along the contour of the rib bones with a long, sharp carving knife to free the bone rack from the meat in one piece. Lay the boneless eye flat and slice into individual steaks of 3/4 inch to 1 inch thickness. Serve the bones to the table — there is significant meat between them and anyone who grew up gnawing rib bones will claim them immediately. Drizzle with au jus and serve horseradish cream alongside.1 cup prepared horseradish cream, 1 cup beef au jus or pan drippings
Notes
Why pull at 120°F? Carryover cooking in a bone-in roast of this mass is real and significant. The outer layers — which have been at or above 140°F during the smoke phase — continue conducting thermal energy inward after the heat source is removed. On a 3-bone roast, the temperature at the geometric center rises 8°F to 12°F during a 30-minute rest. Pulling at 120°F and resting correctly delivers a center of 128°F to 132°F — textbook medium-rare without ever crossing the actin-collapse danger zone at 167°F (75°C) where water-holding capacity fails permanently.
The smoke ring is not flavor — it is chemistry. The pink ring just inside the crust is formed when nitric oxide and carbon monoxide from wood combustion react with surface myoglobin to create carboxymyoglobin and nitrosomyoglobin. These pigments are stable and resist the color change to tan hemichrome even as the surface heats. The depth of the ring is a function of smoke exposure time and surface moisture. Cooking at 225°F with a humid surface environment maximizes ring depth — a thicker ring indicates longer exposure to clean smoke, which is why low-and-slow produces a ring that a hot-and-fast cook cannot replicate.
The 24-hour dry brine is not optional. Salt applied to the surface creates an initial osmotic draw of moisture outward, then diffuses inward carrying dissolved salt back into the tissue. This process takes 18 to 24 hours to complete meaningfully in a roast this size. The salt simultaneously denatures a thin peripheral layer of myosin, creating a gelatin-like surface matrix that holds moisture during the cook. It also lowers the surface water activity (aw), which accelerates the Maillard reaction during the final high-heat sear. A 4-hour brine skips the diffusion phase entirely and leaves you with a salty surface and an unseasoned interior.
Maillard onset at 500°F: The Maillard reaction — the amino-carbonyl cascade producing hundreds of aroma compounds and the brown melanoidin pigments of the crust — begins at roughly 280°F to 330°F at the surface boundary. At 500°F, a dry surface reaches Maillard temperatures within 60 to 90 seconds of contact with the hot pan and radiant heat. Keeping the sear under 12 minutes prevents the outer surface from accumulating enough thermal energy to raise the core temperature significantly — the thermal diffusivity of beef muscle means a 10-minute sear at 500°F penetrates only a few millimeters into the roast.
Nutrition
Calories: 820kcalProtein: 58gFat: 65gSaturated Fat: 27gCholesterol: 185mgSodium: 980mg
Tried this recipe?Let us know how it was!