Smoked Beef Cheeks — Barbacoa-Style Tacos
Equipment
- 1 Offset smoker or kettle grill with indirect setup Maintain 250°F chamber temperature throughout
- 1 Leave-in probe thermometer Essential — alarm set at 165°F for braise transition
- 1 roll Heavy-duty aluminum foil Double-layered for braise-wrap packets
- 1 Blender For adobo — a standard blender or immersion blender works
- 1 Cast iron skillet or comal For toasting chiles and warming tortillas
- 1 Boning knife For scoring silverskin on raw cheeks
- 1 Large rimmed baking sheet For resting and shredding the cheeks post-cook
Ingredients
Beef Cheeks
- 3 pounds whole beef cheeks 2-3 cheeks; silverskin scored, deep intramuscular fat left intact
- 1 tablespoon kosher salt For dry brine 12-24 hours ahead
- 1 teaspoon coarse black pepper
- 1 teaspoon garlic powder
- 1 teaspoon ground cumin
- ½ teaspoon smoked paprika
- ½ teaspoon dried oregano Mexican oregano preferred
Ancho-Guajillo Adobo
- 4 dried ancho chiles Stems and seeds removed
- 3 dried guajillo chiles Stems and seeds removed
- 4 cloves garlic Unpeeled, charred directly over flame or dry skillet
- ½ white onion Roughly chopped
- 2 tablespoons apple cider vinegar Lowers braising pH to accelerate collagen hydrolysis
- 1 teaspoon ground cumin
- 1 teaspoon dried oregano Mexican oregano preferred
- ½ teaspoon ground cinnamon
- ¼ teaspoon ground cloves
- 1 teaspoon kosher salt
- 1.5 cups beef stock Low-sodium; used to thin and blend the adobo
- 2 tablespoons neutral oil For searing the blended adobo
Taco Service
- 16 corn tortillas Small, 4-5 inch; warmed on comal or directly over flame
- 1 white onion Finely diced
- 1 bunch fresh cilantro Leaves and tender stems, roughly chopped
- 3 limes Cut into wedges for service
- 2 serrano chiles Optional; thinly sliced for heat

Instructions
Dry Brine and Prep (Night Before)
- Score the silverskin on each beef cheek with a sharp boning knife in a 1-inch crosshatch pattern. Do not remove the silverskin entirely — scoring allows the rub to penetrate while preventing the membrane from contracting the cheek into a ball during the smoke phase. Leave all deep intramuscular fat intact.
- Combine the kosher salt, black pepper, garlic powder, cumin, smoked paprika, and oregano in a small bowl. Apply the rub evenly over all surfaces of the cheeks, pressing firmly into the scored silverskin. Place uncovered on a rack set over a sheet pan and refrigerate for 12-24 hours. The overnight dry brine is optional but mechanistically sound — salt dissolves into surface moisture, reabsorbs, and raises intracellular ionic strength, improving moisture retention during the early smoke phase.1 tablespoon kosher salt, 1 teaspoon coarse black pepper, 1 teaspoon garlic powder, 1 teaspoon ground cumin, 1/2 teaspoon smoked paprika, 1/2 teaspoon dried oregano
Build the Ancho-Guajillo Adobo
- Heat a dry cast iron skillet over medium-high heat until smoking. Toast the ancho and guajillo chiles for 30 seconds per side, pressing gently with a spatula until fragrant and slightly puffed. Do not allow them to blacken — scorched chiles generate bitter acrolein compounds that survive into the final braise. Transfer immediately to a bowl and cover with 2 cups of just-boiled water. Rehydrate for 15 minutes until fully softened.4 dried ancho chiles, 3 dried guajillo chiles
- Char the unpeeled garlic cloves directly over an open flame or in the dry skillet until blackened in spots, about 2-3 minutes per side. Peel when cool enough to handle — the char adds depth without bitterness at this scale.4 cloves garlic
- Drain the rehydrated chiles (discard the soaking water — it can be bitter). Combine chiles, charred garlic, white onion, apple cider vinegar, cumin, oregano, cinnamon, cloves, salt, and beef stock in a blender. Blend on high for 90 seconds until completely smooth. Pass through a medium-mesh strainer if you want a silkier sauce; leave it unstrained for more body and texture in the braise.4 dried ancho chiles, 3 dried guajillo chiles, 4 cloves garlic, 1/2 white onion, 2 tablespoons apple cider vinegar, 1 teaspoon ground cumin, 1 teaspoon dried oregano, 1/2 teaspoon ground cinnamon, 1/4 teaspoon ground cloves, 1 teaspoon kosher salt
- Heat the neutral oil in the same skillet over medium-high heat until shimmering. Pour the blended adobo carefully into the hot oil — it will spatter. Fry the adobo, stirring constantly, for 4-5 minutes until it darkens by one shade and loses its raw chile smell. This step concentrates the adobo and eliminates volatile off-notes from uncooked dried chiles. Remove from heat and cool. The adobo can be made up to 3 days ahead and refrigerated.1.5 cups beef stock
Smoke Phase — 250°F to 165-170°F Internal
- Fire your smoker to a stable 250°F chamber temperature using post oak or mesquite over a charcoal base. Add a water pan to the smoker chamber if your unit allows it — maintaining relative humidity above 40% slows bark formation slightly but prevents catastrophic surface desiccation during the first 2 hours before the Maillard reaction seals the exterior.
- Insert a leave-in probe into the thickest part of the largest cheek, avoiding any fat pockets. Set a temperature alarm for 165°F. Place the cheeks fat-side up on the smoker grate. Close the lid and do not open for the first 90 minutes — temperature fluctuations from lid-lifting delay bark formation significantly.
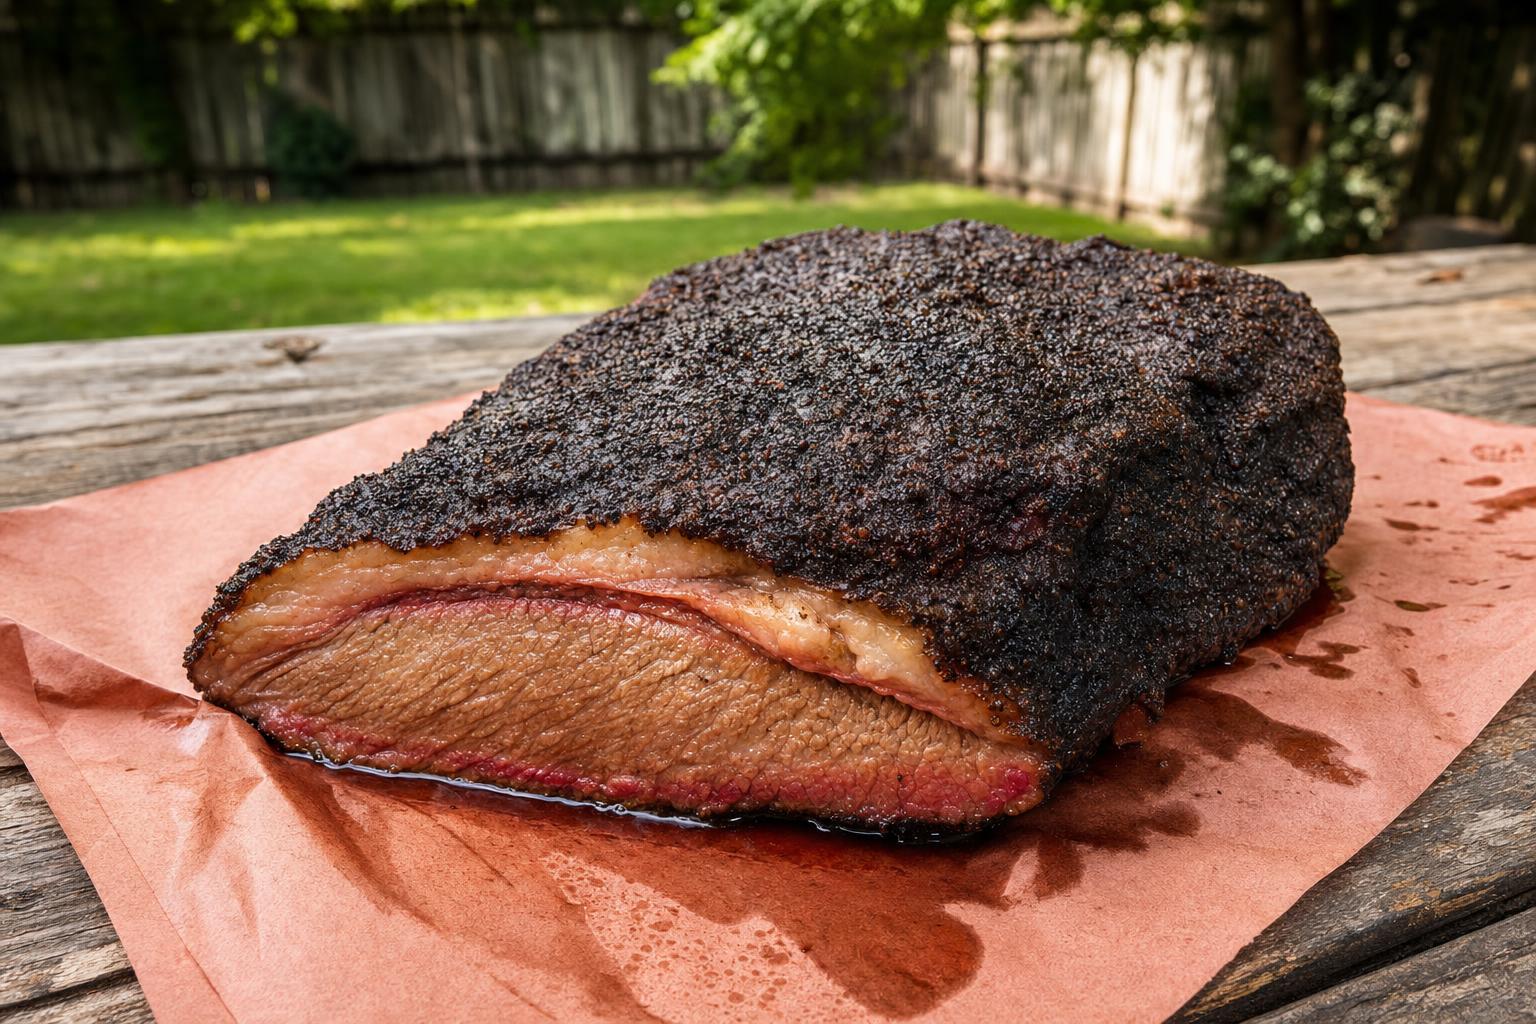
- Maintain wood chunk additions every 45-60 minutes to sustain thin, blue smoke rather than thick white smoke. White smoke deposits excessive creosote and produces a harsh, acrid crust. Smoke the cheeks until the probe alarm fires at 165-170°F internal — approximately 3.5 to 4.5 hours depending on cheek size and ambient temperature. At this point the exterior will be a deep mahogany with a firm, set bark. This is the critical transition window.
Braise-Wrap Finish — 165°F to 205°F Internal
- Pull the cheeks off the smoker. Working quickly to retain heat, place each cheek on a double layer of heavy-duty aluminum foil large enough to fully seal around it. Pour 1/2 to 3/4 cup of the prepared adobo over each cheek, ensuring the liquid puddles beneath and alongside the meat rather than just sitting on top. The liquid needs to generate steam pressure inside the sealed packet — this is what eliminates the stall and drives collagen hydrolysis to completion.2 tablespoons apple cider vinegar, 1 teaspoon ground cumin, 1 teaspoon dried oregano, 1/2 teaspoon ground cinnamon, 1/4 teaspoon ground cloves, 1 teaspoon kosher salt
- Seal the foil packets tightly, folding the edges over twice on each side to prevent steam from escaping. Return the wrapped packets to the 250°F smoker, seam-side up. Reinsert the probe through the foil into the thickest part of the cheek. Set the alarm for 205°F. Cook until the probe reads 205°F consistently for at least 10 minutes — the internal temperature should feel “soft” when pressed through the foil, not firm. This braise phase takes approximately 2.5 to 3.5 additional hours.
- Rest in the packet. Do not open the foil. Move the sealed packets to a dry cooler or turned-off oven and rest undisturbed for 45-60 minutes. During this rest, the internal temperature will drop slowly toward 180°F, and the gelatin-saturated braising liquid will reabsorb into the opened muscle fiber structure. Cheeks pulled directly from the smoker and shredded immediately will feel slightly drier than those allowed this resting phase.
Shred, Reduce the Jus, and Serve
- Open the foil packets over a large rimmed baking sheet, reserving every drop of braising liquid. The cheeks should be soft enough to shred with two forks or by hand — they will pull apart along natural grain lines into long, glossy strands. Discard any remaining large pieces of silverskin that did not fully render. If any section resists shredding, it has not yet reached full gelatin conversion; return it sealed in foil to a 250°F oven for an additional 30 minutes.
- Pour the collected braising liquid into a small saucepan. Skim the surface fat with a spoon or ladle — there will be a significant amount from the rendered intramuscular fat. Bring the defatted liquid to a boil over high heat and reduce by half until it reaches a syrupy consistency that coats a spoon. Taste and adjust salt. Toss the shredded beef in 3-4 tablespoons of the reduced jus until evenly coated and glistening. Reserve the remaining jus for dipping or drizzling at the table.
- Warm the corn tortillas directly over a gas burner flame for 20-30 seconds per side until charred in spots, or on a dry cast iron comal over high heat. Double the tortillas for each taco — this is the street taco standard and provides structural support for the heavy, moist filling.2 tablespoons neutral oil
- Build each taco: a generous spoonful of shredded barbacoa, a pinch of finely diced white onion, a scatter of fresh cilantro, and a hard squeeze of lime directly over the meat. Serve the reduced braising jus on the side in a small bowl for dipping. Offer sliced serrano for those who want heat. Consume immediately — the tortillas begin absorbing moisture from the braised meat within minutes.2 tablespoons neutral oil, 16 corn tortillas, 1 white onion, 1 bunch fresh cilantro, 3 limes
Notes
Nutrition
The first time you hold a raw beef cheek, you feel immediately why it earns its reputation. Dense. Marbled. Sheeted with thick, pearlescent connective tissue on every surface. This is a muscle that spent its entire life in continuous motion — chewing, grinding — and it shows. That same architecture that makes the cheek look brutish and unforgiving is exactly what makes it extraordinary on a smoker. All that connective tissue is pure collagen, and collagen, given enough time and heat, becomes gelatin. Liquid silk. The reason barbacoa — real barbacoa, the kind sold out of steam pits in Monterrey and Juárez at 4 in the morning — coats your tongue and refuses to let go.
This recipe fuses the smoke-ring depth of Texas BBQ with the chile-braised soul of northern Mexican barbacoa. The technique is a two-act play: low smoke at 250°F to build bark and begin rendering, then a braise-wrap finish in ancho and guajillo adobo to push through 205°F internal where the cheeks shred with nothing more than the weight of two forks. Served on warm corn tortillas with white onion, cilantro, and a hard squeeze of lime, smoked beef cheek barbacoa is one of the most technically complete tacos you can make in a backyard smoker.
Why do beef cheeks need a two-phase cook? The collagen science
Beef cheeks need a two-phase cook because their collagen load — approximately 6–9% by weight — demands more than a dry smoker can deliver on its own. Collagen is a triple-helix structural protein that begins thermally shrinking around 60–65°F, expelling intracellular fluid. This is the moment a beef cheek cook can go wrong: if the cook stays dry past this point without enough time and moisture, actin networks denature above 74°F and water-holding capacity collapses permanently, leaving stringy, gritty meat regardless of how high the internal temperature climbs. The solution is the braise-wrap: once the cheeks hit 165–170°F internal and bark is set, seal them in foil with concentrated chile braising liquid. That exogenous moisture keeps the fiber environment saturated while temperature climbs toward the collagen hydrolysis zone.
Collagen hydrolysis — the actual conversion of collagen cross-links into soluble gelatin — is a first-order kinetic reaction governed by temperature and time. The rate is exponential: hydrolysis that takes 12 hours at 160°F takes roughly 4–6 hours at 200–210°F. The mildly acidic pH of the ancho-guajillo braising liquid (approximately pH 4.5–5.0) further catalyzes the reaction by protonating the peptide bonds holding collagen’s triple helix together, shortening the time to full conversion. This is why a chile braise always outperforms plain water or stock as a braising medium for barbacoa — the chemistry is working for you, not just the heat.
The stall — that infuriating plateau between 160–170°F internal — occurs because the beef cheek’s wet surface evaporates moisture as fast as the smoker delivers energy, holding the boundary layer at 212°F while the core stalls. In a dry cook this plateau can last 90 minutes or more. The braise-wrap seals off evaporation entirely, eliminating the stall’s evaporative mechanism and allowing the internal temperature to climb steadily to the 205°F target. The braise-wrap is not a shortcut — it is the mechanistically correct approach to cooking a muscle this loaded with connective tissue.
What equipment and ingredients make the difference here?
Beef cheeks are the non-negotiable center of this recipe. Source whole, untrimmed cheeks from a butcher or Latin meat market — they typically run 1 to 1.5 pounds each before trimming. The thick silverskin on the exterior must be scored or partially removed before seasoning, or it will contract during smoking and prevent rub penetration. Leave the deep intramuscular fat intact; it is the basting mechanism throughout the cook.
For the adobo, dried ancho and guajillo chiles are mandatory — they are not interchangeable with chili powder. Anchos (dried poblanos) bring a raisiny, dark-fruit earthiness with mild heat. Guajillos bring brightness, a slight tartness, and a sharp red pigment that gives barbacoa its characteristic brick-red color. Toast the dried chiles dry in a hot skillet for 30 seconds per side until fragrant but not burnt — scorched chiles turn acrid — then rehydrate in hot water for 15 minutes before blending. Apple cider vinegar in the adobo contributes acetic acid, lowering the braising liquid pH and accelerating hydrolysis.
On the smoker, post oak or mesquite over a charcoal base at 250°F is the target. A water pan in the smoker maintains relative humidity above 40%, which slows bark set slightly but prevents catastrophic surface desiccation in the first two hours. A reliable leave-in thermometer with an alarm set at 165°F is essential — pulling to braise at exactly the right moment, before actin degradation accelerates, is the most critical timing decision in the entire cook.
Smoked Beef Cheeks — Barbacoa-Style Tacos
Equipment
- 1 Offset smoker or kettle grill with indirect setup Maintain 250°F chamber temperature throughout
- 1 Leave-in probe thermometer Essential — alarm set at 165°F for braise transition
- 1 roll Heavy-duty aluminum foil Double-layered for braise-wrap packets
- 1 Blender For adobo — a standard blender or immersion blender works
- 1 Cast iron skillet or comal For toasting chiles and warming tortillas
- 1 Boning knife For scoring silverskin on raw cheeks
- 1 Large rimmed baking sheet For resting and shredding the cheeks post-cook
Ingredients
Beef Cheeks
- 3 pounds whole beef cheeks 2-3 cheeks; silverskin scored, deep intramuscular fat left intact
- 1 tablespoon kosher salt For dry brine 12-24 hours ahead
- 1 teaspoon coarse black pepper
- 1 teaspoon garlic powder
- 1 teaspoon ground cumin
- ½ teaspoon smoked paprika
- ½ teaspoon dried oregano Mexican oregano preferred
Ancho-Guajillo Adobo
- 4 dried ancho chiles Stems and seeds removed
- 3 dried guajillo chiles Stems and seeds removed
- 4 cloves garlic Unpeeled, charred directly over flame or dry skillet
- ½ white onion Roughly chopped
- 2 tablespoons apple cider vinegar Lowers braising pH to accelerate collagen hydrolysis
- 1 teaspoon ground cumin
- 1 teaspoon dried oregano Mexican oregano preferred
- ½ teaspoon ground cinnamon
- ¼ teaspoon ground cloves
- 1 teaspoon kosher salt
- 1.5 cups beef stock Low-sodium; used to thin and blend the adobo
- 2 tablespoons neutral oil For searing the blended adobo
Taco Service
- 16 corn tortillas Small, 4-5 inch; warmed on comal or directly over flame
- 1 white onion Finely diced
- 1 bunch fresh cilantro Leaves and tender stems, roughly chopped
- 3 limes Cut into wedges for service
- 2 serrano chiles Optional; thinly sliced for heat
Instructions
Dry Brine and Prep (Night Before)
- Score the silverskin on each beef cheek with a sharp boning knife in a 1-inch crosshatch pattern. Do not remove the silverskin entirely — scoring allows the rub to penetrate while preventing the membrane from contracting the cheek into a ball during the smoke phase. Leave all deep intramuscular fat intact.
- Combine the kosher salt, black pepper, garlic powder, cumin, smoked paprika, and oregano in a small bowl. Apply the rub evenly over all surfaces of the cheeks, pressing firmly into the scored silverskin. Place uncovered on a rack set over a sheet pan and refrigerate for 12-24 hours. The overnight dry brine is optional but mechanistically sound — salt dissolves into surface moisture, reabsorbs, and raises intracellular ionic strength, improving moisture retention during the early smoke phase.1 tablespoon kosher salt, 1 teaspoon coarse black pepper, 1 teaspoon garlic powder, 1 teaspoon ground cumin, 1/2 teaspoon smoked paprika, 1/2 teaspoon dried oregano
Build the Ancho-Guajillo Adobo
- Heat a dry cast iron skillet over medium-high heat until smoking. Toast the ancho and guajillo chiles for 30 seconds per side, pressing gently with a spatula until fragrant and slightly puffed. Do not allow them to blacken — scorched chiles generate bitter acrolein compounds that survive into the final braise. Transfer immediately to a bowl and cover with 2 cups of just-boiled water. Rehydrate for 15 minutes until fully softened.4 dried ancho chiles, 3 dried guajillo chiles
- Char the unpeeled garlic cloves directly over an open flame or in the dry skillet until blackened in spots, about 2-3 minutes per side. Peel when cool enough to handle — the char adds depth without bitterness at this scale.4 cloves garlic
- Drain the rehydrated chiles (discard the soaking water — it can be bitter). Combine chiles, charred garlic, white onion, apple cider vinegar, cumin, oregano, cinnamon, cloves, salt, and beef stock in a blender. Blend on high for 90 seconds until completely smooth. Pass through a medium-mesh strainer if you want a silkier sauce; leave it unstrained for more body and texture in the braise.4 dried ancho chiles, 3 dried guajillo chiles, 4 cloves garlic, 1/2 white onion, 2 tablespoons apple cider vinegar, 1 teaspoon ground cumin, 1 teaspoon dried oregano, 1/2 teaspoon ground cinnamon, 1/4 teaspoon ground cloves, 1 teaspoon kosher salt
- Heat the neutral oil in the same skillet over medium-high heat until shimmering. Pour the blended adobo carefully into the hot oil — it will spatter. Fry the adobo, stirring constantly, for 4-5 minutes until it darkens by one shade and loses its raw chile smell. This step concentrates the adobo and eliminates volatile off-notes from uncooked dried chiles. Remove from heat and cool. The adobo can be made up to 3 days ahead and refrigerated.1.5 cups beef stock
Smoke Phase — 250°F to 165-170°F Internal
- Fire your smoker to a stable 250°F chamber temperature using post oak or mesquite over a charcoal base. Add a water pan to the smoker chamber if your unit allows it — maintaining relative humidity above 40% slows bark formation slightly but prevents catastrophic surface desiccation during the first 2 hours before the Maillard reaction seals the exterior.
- Insert a leave-in probe into the thickest part of the largest cheek, avoiding any fat pockets. Set a temperature alarm for 165°F. Place the cheeks fat-side up on the smoker grate. Close the lid and do not open for the first 90 minutes — temperature fluctuations from lid-lifting delay bark formation significantly.
- Maintain wood chunk additions every 45-60 minutes to sustain thin, blue smoke rather than thick white smoke. White smoke deposits excessive creosote and produces a harsh, acrid crust. Smoke the cheeks until the probe alarm fires at 165-170°F internal — approximately 3.5 to 4.5 hours depending on cheek size and ambient temperature. At this point the exterior will be a deep mahogany with a firm, set bark. This is the critical transition window.
Braise-Wrap Finish — 165°F to 205°F Internal
- Pull the cheeks off the smoker. Working quickly to retain heat, place each cheek on a double layer of heavy-duty aluminum foil large enough to fully seal around it. Pour 1/2 to 3/4 cup of the prepared adobo over each cheek, ensuring the liquid puddles beneath and alongside the meat rather than just sitting on top. The liquid needs to generate steam pressure inside the sealed packet — this is what eliminates the stall and drives collagen hydrolysis to completion.2 tablespoons apple cider vinegar, 1 teaspoon ground cumin, 1 teaspoon dried oregano, 1/2 teaspoon ground cinnamon, 1/4 teaspoon ground cloves, 1 teaspoon kosher salt
- Seal the foil packets tightly, folding the edges over twice on each side to prevent steam from escaping. Return the wrapped packets to the 250°F smoker, seam-side up. Reinsert the probe through the foil into the thickest part of the cheek. Set the alarm for 205°F. Cook until the probe reads 205°F consistently for at least 10 minutes — the internal temperature should feel “soft” when pressed through the foil, not firm. This braise phase takes approximately 2.5 to 3.5 additional hours.
- Rest in the packet. Do not open the foil. Move the sealed packets to a dry cooler or turned-off oven and rest undisturbed for 45-60 minutes. During this rest, the internal temperature will drop slowly toward 180°F, and the gelatin-saturated braising liquid will reabsorb into the opened muscle fiber structure. Cheeks pulled directly from the smoker and shredded immediately will feel slightly drier than those allowed this resting phase.
Shred, Reduce the Jus, and Serve
- Open the foil packets over a large rimmed baking sheet, reserving every drop of braising liquid. The cheeks should be soft enough to shred with two forks or by hand — they will pull apart along natural grain lines into long, glossy strands. Discard any remaining large pieces of silverskin that did not fully render. If any section resists shredding, it has not yet reached full gelatin conversion; return it sealed in foil to a 250°F oven for an additional 30 minutes.
- Pour the collected braising liquid into a small saucepan. Skim the surface fat with a spoon or ladle — there will be a significant amount from the rendered intramuscular fat. Bring the defatted liquid to a boil over high heat and reduce by half until it reaches a syrupy consistency that coats a spoon. Taste and adjust salt. Toss the shredded beef in 3-4 tablespoons of the reduced jus until evenly coated and glistening. Reserve the remaining jus for dipping or drizzling at the table.
- Warm the corn tortillas directly over a gas burner flame for 20-30 seconds per side until charred in spots, or on a dry cast iron comal over high heat. Double the tortillas for each taco — this is the street taco standard and provides structural support for the heavy, moist filling.2 tablespoons neutral oil
- Build each taco: a generous spoonful of shredded barbacoa, a pinch of finely diced white onion, a scatter of fresh cilantro, and a hard squeeze of lime directly over the meat. Serve the reduced braising jus on the side in a small bowl for dipping. Offer sliced serrano for those who want heat. Consume immediately — the tortillas begin absorbing moisture from the braised meat within minutes.2 tablespoons neutral oil, 16 corn tortillas, 1 white onion, 1 bunch fresh cilantro, 3 limes
Notes
Nutrition
How do I nail smoked beef cheek barbacoa every time?
- Score the silverskin before rubbing. Uncut silverskin contracts violently during smoking, pulling the beef cheek into a tight ball and preventing the rub from forming bark on the underside. Use a sharp boning knife to crosshatch the silverskin at 1-inch intervals without cutting into the meat.
- Do not skip the overnight dry brine. Salting 12–24 hours ahead draws moisture out, dissolves it with the salt, and reabsorbs it — this raises the intracellular ionic strength, which shifts the myosin denaturation curve slightly higher and helps the cheeks retain moisture during the early smoke phase.
- Pull to braise at 165–170°F, not before. Wrapping too early traps the cheeks before Maillard browning has completed the bark. Wrapping too late — above 175°F — means actin is already degrading at the surface without moisture protection. The 165–170°F window is the mechanistically correct transition point.
- Use enough braising liquid to steam, not just moisten. The foil packet needs at least 1/2 cup of adobo per cheek to generate steam pressure inside the packet. Insufficient liquid means the cheeks effectively roast rather than braise, defeating the purpose of the wet finish.
- Rest the cheeks in the braising liquid, not on a cutting board. Unlike a steak, beef cheeks benefit from resting submerged in their own jus inside the sealed foil for 30–45 minutes. This allows the gelatin-saturated liquid to reabsorb into the opened fiber structure as the internal temperature drops toward 180°F.
- Reduce the braising jus before serving. Skim the fat, then reduce the remaining braising liquid on the stovetop by half until syrupy. Toss the shredded meat in this concentrated jus before filling tortillas — it is the difference between good barbacoa and extraordinary barbacoa.
What variations and swaps work for this recipe?
Chuck roast is the most practical substitute if beef cheeks are unavailable. A boneless 3–4 pound chuck roast follows identical technique and timing, though its collagen density is lower — roughly 3–5% versus 6–9% in cheeks — so the shred will be slightly less glossy and the braising jus will gel less firmly when chilled. Extend the braise phase by 30–45 minutes to compensate for the lower hydrolysis yield.
For a deeper, more complex adobo, add two dried chipotles en adobo to the blender with the rehydrated ancho and guajillo chiles. This raises the heat level moderately and introduces a secondary layer of smoke from the chipotle’s own processing. Conversely, for a milder family-friendly version, substitute one of the guajillos with a pasilla chile, which is darker and fruitier with almost no heat.
The taco service toppings are intentionally minimal — white onion and cilantro is the classic Mexico City street-taco standard for a reason. The clean, sharp onion and herbaceous cilantro cut through the fat richness without competing with the chile-and-smoke complexity. If you want to expand the condiment spread, a charred tomatillo salsa verde or a simple avocado crema both pair correctly. Pickled red onions bring both acid and color contrast. Avoid heavy, cream-based toppings that mask the braising jus flavor you worked hours to build.
This recipe scales linearly. Four whole beef cheeks at 4–6 pounds feed a party of 8–10 with tortillas. The braise-wrap technique requires no adjustment at scale — simply ensure each cheek has its own foil packet with sufficient liquid rather than stacking them, which traps steam unevenly and produces inconsistent internal temperatures across the batch.
Frequently asked questions
What internal temperature should beef cheeks reach for barbacoa? Beef cheeks should reach 205°F internal temperature for barbacoa-style shredding. At 205°F, collagen has fully converted to gelatin and the muscle fibers separate effortlessly; pulling at 195°F yields a chewier, less cohesive result.
Why do beef cheeks need a braise finish instead of cooking dry the whole way? Beef cheeks require a wet braise finish because once actin proteins denature above 74°F, the muscle rapidly expels moisture — a dry smoker cannot replace that lost water fast enough to prevent desiccation. Surrounding the cheeks in chile braising liquid provides exogenous moisture and gelatin-building hydration that keeps the shred silky rather than dry and stringy.
Can I use a different cut if I can’t find beef cheeks? Chuck roast is the closest substitute for beef cheeks in this recipe, though chuck has slightly less collagen density — typically 3–5% versus 6–9% in cheeks. Increase the braise time by 30–45 minutes to ensure full gelatin conversion and expect a slightly less glossy shred.
What wood should I use for smoking beef cheeks? Post oak or mesquite are the traditional Texas and northern Mexico choices for beef — oak delivers a medium, clean smoke that complements the chile adobo without overpowering it. Avoid fruit woods for this recipe; their sweetness conflicts with the earthy guajillo-ancho profile.
How long does the stall last on beef cheeks? The stall on beef cheeks smoked at 250°F typically lasts 45–90 minutes, occurring between 160–170°F internal. The braise-wrap technique in this recipe deliberately bypasses most of the stall by sealing the cheeks in liquid-filled foil, which eliminates the evaporative cooling that causes it.
Are these tacos gluten-free? Yes, as written this recipe is gluten-free — all components including the adobo and corn tortillas contain no wheat or gluten-bearing ingredients. Always verify your dried chiles and canned tomato products are processed in a gluten-free facility if celiac disease is a concern.