Tomahawk Ribeye — Reverse Sear
Equipment
- 1 Wire rack set inside a rimmed half-sheet baking pan Elevates the steak so air circulates beneath it during the oven phase — prevents the bottom side from steaming.
- 1 Leave-in probe thermometer Position the probe in the geometric center of the eye, not near the bone or in a fat pocket. ThermoWorks ChefAlarm or equivalent.
- 1 12-inch cast-iron skillet Must be preheated a full 10 minutes over maximum gas heat before the steak touches it. Alternatively, a charcoal grill set up with the grate 2 inches above glowing coals.
- 1 Instant-read thermometer Optional but useful for confirming final internal temp after the sear.
- 1 Boning knife For slicing cleanly along the rib bone for tableside presentation.
Ingredients
- 1 tomahawk ribeye, approximately 2.5 inches thick and 2.5 to 3.5 lbs Bone-in, with the rib bone frenched. Have your butcher confirm thickness — thickness controls oven time, weight does not.
- 1 teaspoon per pound of meat Diamond Crystal kosher salt For the dry brine. If using Morton kosher salt, use half the volume — Morton is roughly twice as dense. Do not use table salt.
- 1 teaspoon coarsely ground black pepper Apply immediately before the sear, not during the dry-brine phase — pepper burns at high sear temperatures if applied too early.
- 1 tablespoon avocado oil or refined beef tallow Smoke point above 500°F. Added to the pan immediately before the steak, not during the preheat.
Optional Compound Butter (for resting phase)
- 4 tablespoons unsalted butter, softened to room temperature
- 2 cloves fresh garlic, minced
- 1 tablespoon fresh thyme leaves
- 1 tablespoon fresh rosemary, finely chopped
- 1 pinch flaky sea salt Maldon or similar.

Instructions
Dry Brine (24 Hours or 45 Minutes Ahead)
- Pat the tomahawk completely dry with paper towels on all surfaces including around the bone. Season generously on all sides with kosher salt at a rate of 1 teaspoon Diamond Crystal per pound of meat — roughly 2.5 to 3.5 teaspoons total for a standard tomahawk. Stand the steak upright on the wire rack set over a rimmed baking sheet so all surfaces are exposed to air.For best results, refrigerate uncovered for 24 hours. The salt draws surface moisture out via osmosis, then the moisture fully reabsorbs into the meat over the next 12 to 18 hours, carrying dissolved salt deep into the myofibrillar water phase. This raises the ionic strength of the muscle tissue and measurably increases water-holding capacity in the cooked steak. If you are short on time, salt at least 45 minutes ahead — the worst window is 5 to 40 minutes after salting, when surface moisture has been drawn out but not yet reabsorbed.1 tomahawk ribeye, approximately 2.5 inches thick and 2.5 to 3.5 lbs, 1 teaspoon per pound of meat Diamond Crystal kosher salt
Optional: Make Compound Butter
- Combine softened butter with minced garlic, thyme, rosemary, and flaky sea salt. Mix thoroughly, roll tightly in plastic wrap into a log shape, and refrigerate until firm. This can be made up to 5 days ahead. Slice a half-inch round when ready to use.4 tablespoons unsalted butter, softened to room temperature, 2 cloves fresh garlic, minced, 1 tablespoon fresh thyme leaves, 1 tablespoon fresh rosemary, finely chopped, 1 pinch flaky sea salt
The Low-Temperature Oven Phase
- Preheat your oven to 225°F. Allow at least 20 minutes for the oven to fully stabilize at temperature — home ovens cycle and overshoot on initial heat-up. A pizza stone or baking steel on a lower rack helps buffer temperature swings if you have one.
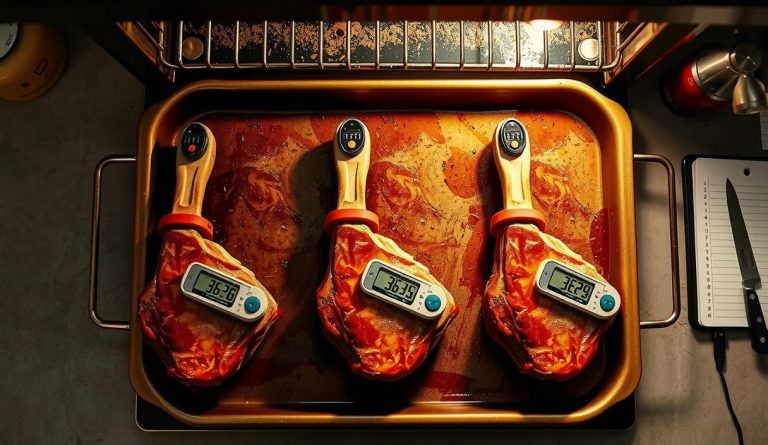
- Remove the steak from the refrigerator. Insert your probe thermometer into the geometric center of the ribeye eye — not adjacent to the bone, not into a thick fat seam. The probe tip should be equidistant from all surfaces of the eye muscle. Position the steak on the wire rack with the bone pointing away from the oven’s rear heating element or dominant heat source. This is critical: the bone conducts heat slowly and will lag 10°F to 15°F behind the eye muscle during the oven phase. Pointing the bone toward the heat source does not compensate — it creates an uneven cook on the bone-side lobe that persists through the sear.1 tomahawk ribeye, approximately 2.5 inches thick and 2.5 to 3.5 lbs
- Slide the baking sheet into the oven. For a 2.5-inch tomahawk, expect 90 to 110 minutes to reach 115°F internal. Monitor the probe thermometer continuously. Do not open the oven repeatedly — every opening drops the oven temperature by 25°F to 40°F and adds time. Begin checking the probe display at the 80-minute mark. Pull the steak from the oven when the probe reads exactly 115°F.1 tomahawk ribeye, approximately 2.5 inches thick and 2.5 to 3.5 lbs
Prepare for the Sear
- While the steak is in the final 20 minutes of the oven phase, place your cast-iron skillet over the largest burner on your gas range at maximum heat. Allow it to preheat for a full 10 minutes. The pan is ready when a drop of water vaporizes instantly on contact and the surface reads 580°F to 650°F on an infrared thermometer. If using a charcoal grill, light a full chimney of hardwood lump charcoal and allow it to ash over completely, then dump it and position the grate 2 inches above the coals.
- When the steak reaches 115°F and comes out of the oven, pat every surface completely dry with fresh paper towels including the sides and around the bone. Any visible moisture on the surface will create an evaporative cooling buffer that delays Maillard browning by 30 to 60 seconds — enough time for the sear to drive the core temperature past your target. Season with coarsely ground black pepper on all surfaces now. Do not apply pepper earlier in the process as it will char on a 600°F surface if pre-applied during dry brining.1 tomahawk ribeye, approximately 2.5 inches thick and 2.5 to 3.5 lbs, 1 teaspoon coarsely ground black pepper
The High-Temperature Sear
- Add avocado oil or tallow to the screaming-hot cast-iron skillet. It should shimmer and begin to smoke within 5 seconds. Allow it to heat for 10 seconds after adding, then immediately lay the steak flat — eye side down — with the bone angled away from the hottest part of the burner. Press gently on the steak with a spatula or your palm (through a towel) to ensure maximum surface contact with the metal. Do not move the steak.1 tomahawk ribeye, approximately 2.5 inches thick and 2.5 to 3.5 lbs, 1 tablespoon avocado oil or refined beef tallow
- Sear for 60 to 90 seconds on the first side until a deep mahogany crust forms — you will see it creeping up the sides of the steak. Flip once. Sear the second side for 60 to 90 seconds. Using tongs, hold the steak vertically and sear all four sides (edges including the fat cap) for 20 to 30 seconds each. This renders the fat cap and seals the crust on surfaces that would otherwise remain pale. The total active sear time should not exceed 4 minutes — if you need more time than this to develop the crust, your pan was not hot enough at the start.1 tomahawk ribeye, approximately 2.5 inches thick and 2.5 to 3.5 lbs
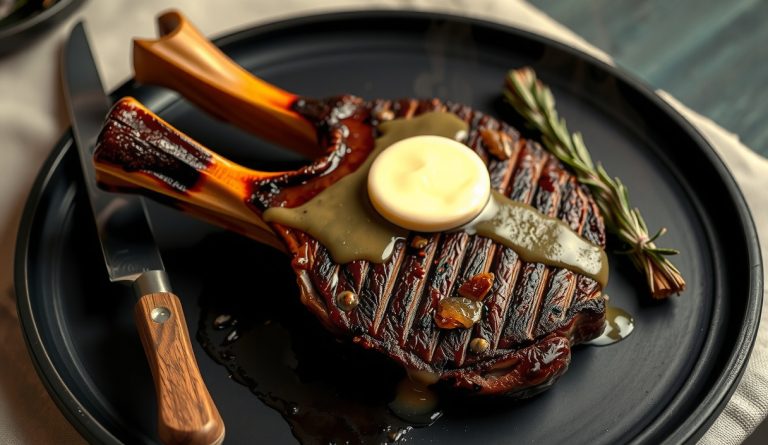
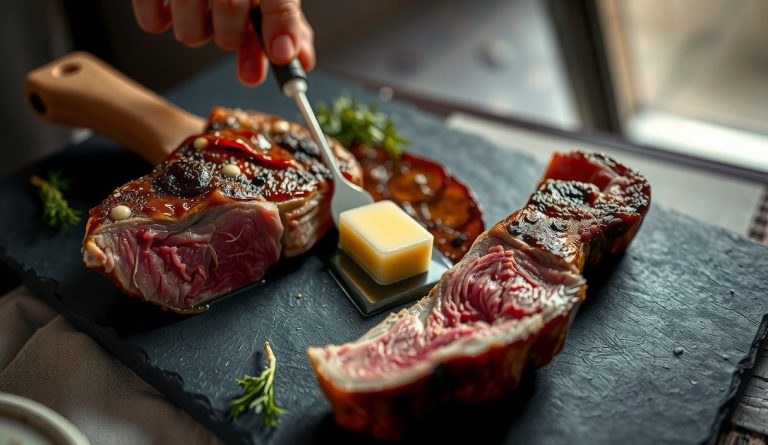
- Transfer the steak immediately to a clean wire rack set over a cutting board. Do not place it directly on the cutting board — elevating it prevents the crust from steaming and softening on the underside. If using compound butter, place one slice on top of the steak now — the residual crust heat will melt it over the rest period without cooking the butter past its smoke point.1 tomahawk ribeye, approximately 2.5 inches thick and 2.5 to 3.5 lbs, 4 tablespoons unsalted butter, softened to room temperature, 2 cloves fresh garlic, minced, 1 tablespoon fresh thyme leaves, 1 tablespoon fresh rosemary, finely chopped, 1 pinch flaky sea salt
Rest and Serve
- Rest the steak for a minimum of 10 minutes, uncovered. Tenting with foil traps steam and softens the crust you just worked to build — do not tent. During rest, conduction equalizes the steep thermal gradient between the seared exterior and the core. The carryover during this phase is minimal compared to the sear but real — expect the core to rise approximately 3°F to 5°F during the rest.
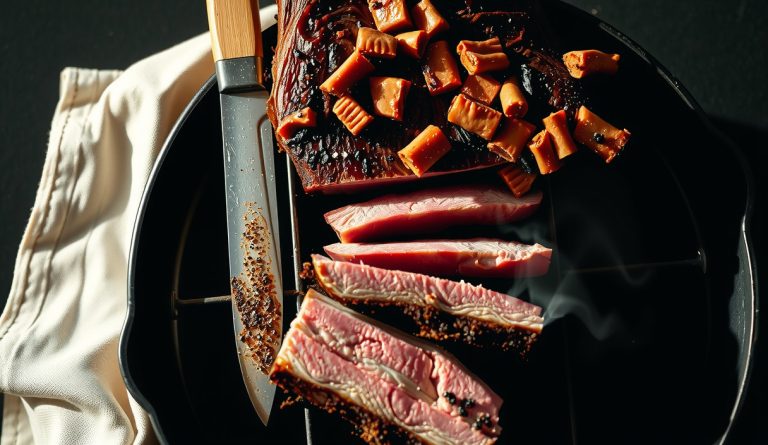
- To serve: using a boning knife, slice cleanly along the rib bone to free the eye from the bone in one intact piece. Then slice the eye against the grain into half-inch planks. Re-plate the bone alongside the sliced meat for presentation. Finish with a pinch of flaky sea salt over the cut surfaces if desired. The internal temperature at service for a properly executed reverse sear targeting 115°F pull should read 128°F to 132°F — the heart of medium-rare.1 tomahawk ribeye, approximately 2.5 inches thick and 2.5 to 3.5 lbs, 1 teaspoon per pound of meat Diamond Crystal kosher salt
Notes
Nutrition
The first time you carry a tomahawk ribeye out of a grocery store, you feel slightly ridiculous. The 14-inch rib bone juts out of the bag like a medieval weapon and the butcher is already grinning at you. But that absurd piece of architecture is hiding one of the most physically interesting cooking problems in the BBQ canon: a steak so thick and so thermally uneven that every conventional searing protocol fails it. High heat from the jump scorches the exterior long before the center moves. Sous vide is technically correct but surrenders the crust texture that makes a ribeye worth eating. The reverse sear — low oven first, screaming-hot sear last — is the only method that aligns the physics of this cut in your favor.
The details that separate a good tomahawk from a transcendent one are small in number but unforgiving in consequence: the temperature at which you pull the steak from the oven, the surface dryness you achieve before the sear, and — critically — the spatial relationship between that bone and your heat source. Get those three variables right and the rest is gravy, literally.
Why does a tomahawk ribeye demand the reverse sear? The science
A tomahawk is a bone-in ribeye with the rib bone left long and frenched, and that bone is a thermal mass that actively resists heating. The dense cortical bone has a specific heat capacity roughly 40% lower than lean muscle tissue, and its thermal conductivity is dramatically lower than the surrounding fat and myofibrillar protein. This makes the bone a cold sink: it absorbs heat slowly, then radiates that absorbed energy back into the meat around it long after you pull the steak from the fire. The practical consequence is that the meat immediately adjacent to the bone runs 10°F to 15°F cooler than the geometric center of the eye during the oven phase. If you position the bone toward your heat source on the sear, you also shield that lobe of meat from radiant energy, creating a cold stripe that survives all the way to the plate as a gray, undercooked band. Keep the bone away from direct flame and let the flat face of the eye receive maximum radiant input during both the oven phase and the sear.
The reverse sear works because it decouples two thermodynamically competing goals: bringing the core to the correct protein-denaturation window and generating the Maillard crust. Maillard browning — the cascade of amino-carbonyl condensation reactions that produces hundreds of volatile organic compounds and the dark melanoidin pigments we associate with a premium crust — requires surface temperatures above 280°F (138°C) and, critically, a low surface water activity. At a 225°F oven temperature, the surface of the steak equilibrates slowly toward the air temperature. Over 90 to 110 minutes, free moisture evaporates from the surface, progressively dropping the water activity at the boundary layer. By the time the core hits 115°F, the surface is essentially dry. When you slam that dry surface onto a 600°F cast iron or grill grate, there is no evaporative cooling buffer to fight — surface temperature spikes past the Maillard onset threshold almost immediately. A steak seared from raw needs 3 to 4 minutes per side to achieve the same crust; a reverse-seared steak achieves superior browning in 60 to 90 seconds per side, which means the thermal wave from the sear never penetrates deep enough to push the interior past your target. The result is an edge-to-edge uniform cook with a crust that shatters rather than steams.
Collagen in the ribeye cap and intercostal muscle sits in the 2% to 4% range — not enough to require the prolonged hydrolysis of a braise — but the intramuscular fat (marbling) is where the cut earns its reputation. Lipid rendering in heavily marbled beef begins around 100°F (38°C) for the lowest-melting triacylglycerols and accelerates as internal temperature climbs. Holding the core at 115°F before the sear means the marbling has already begun to mobilize; the subsequent sear drives the surface temperature through the β-prime crystal melting range, releasing liquid fat into the crust and generating a basted, lacquered surface without any butter in the pan. Salt the steak 45 minutes before cooking or 24 hours before — the intermediate window of 5 to 40 minutes is the one range to avoid, when osmotic draw has pulled moisture to the surface but that moisture has not yet been reabsorbed. Overnight dry-brining maximizes surface dehydration and allows the salt to equilibrate fully into the myofibrillar water phase, raising ionic strength and measurably increasing the water-holding capacity of the cooked meat.
What equipment and ingredients do I need?
The steak: A 2.5-inch-thick tomahawk typically runs 2.5 to 3.5 lbs. Have your butcher confirm the thickness, not the weight — thickness is the controlling variable for oven time. A 2-inch tomahawk will hit 115°F internal in 60 to 70 minutes; a 3-inch specimen may need 120 minutes. Verify with a probe thermometer, not a timer.
Kosher salt: Use Diamond Crystal at 1 teaspoon per pound of meat for the dry brine. Morton kosher is roughly twice as dense — use half the volume if substituting.
Thermometer: A leave-in probe thermometer positioned in the geometric center of the eye — not near the bone, not in fat — is non-negotiable. The ThermoWorks Signals, ChefAlarm, or any calibrated probe thermometer works. A second instant-read for confirming the final sear temperature is helpful but optional.
Searing surface: A 12-inch or larger cast-iron skillet preheated on a gas burner at maximum for 10 minutes reaches 550°F to 650°F at the surface, which is the target range. Alternatively, a chimney-lit charcoal grill with the grate positioned two inches above glowing coals works perfectly and adds smoke. Avoid stainless steel pans — they do not hold heat adequately when a cold, wet protein hits the surface and they will bond to the crust.
Tallow or avocado oil: These fats have smoke points above 500°F. Butter burns at 300°F; add butter only in the final 30 seconds of the sear for flavor, never as the primary cooking fat. Compound butter goes on the resting steak, not in the pan.
Tomahawk Ribeye — Reverse Sear
Equipment
- 1 Wire rack set inside a rimmed half-sheet baking pan Elevates the steak so air circulates beneath it during the oven phase — prevents the bottom side from steaming.
- 1 Leave-in probe thermometer Position the probe in the geometric center of the eye, not near the bone or in a fat pocket. ThermoWorks ChefAlarm or equivalent.
- 1 12-inch cast-iron skillet Must be preheated a full 10 minutes over maximum gas heat before the steak touches it. Alternatively, a charcoal grill set up with the grate 2 inches above glowing coals.
- 1 Instant-read thermometer Optional but useful for confirming final internal temp after the sear.
- 1 Boning knife For slicing cleanly along the rib bone for tableside presentation.
Ingredients
- 1 tomahawk ribeye, approximately 2.5 inches thick and 2.5 to 3.5 lbs Bone-in, with the rib bone frenched. Have your butcher confirm thickness — thickness controls oven time, weight does not.
- 1 teaspoon per pound of meat Diamond Crystal kosher salt For the dry brine. If using Morton kosher salt, use half the volume — Morton is roughly twice as dense. Do not use table salt.
- 1 teaspoon coarsely ground black pepper Apply immediately before the sear, not during the dry-brine phase — pepper burns at high sear temperatures if applied too early.
- 1 tablespoon avocado oil or refined beef tallow Smoke point above 500°F. Added to the pan immediately before the steak, not during the preheat.
Optional Compound Butter (for resting phase)
- 4 tablespoons unsalted butter, softened to room temperature
- 2 cloves fresh garlic, minced
- 1 tablespoon fresh thyme leaves
- 1 tablespoon fresh rosemary, finely chopped
- 1 pinch flaky sea salt Maldon or similar.
Instructions
Dry Brine (24 Hours or 45 Minutes Ahead)
- Pat the tomahawk completely dry with paper towels on all surfaces including around the bone. Season generously on all sides with kosher salt at a rate of 1 teaspoon Diamond Crystal per pound of meat — roughly 2.5 to 3.5 teaspoons total for a standard tomahawk. Stand the steak upright on the wire rack set over a rimmed baking sheet so all surfaces are exposed to air.For best results, refrigerate uncovered for 24 hours. The salt draws surface moisture out via osmosis, then the moisture fully reabsorbs into the meat over the next 12 to 18 hours, carrying dissolved salt deep into the myofibrillar water phase. This raises the ionic strength of the muscle tissue and measurably increases water-holding capacity in the cooked steak. If you are short on time, salt at least 45 minutes ahead — the worst window is 5 to 40 minutes after salting, when surface moisture has been drawn out but not yet reabsorbed.1 tomahawk ribeye, approximately 2.5 inches thick and 2.5 to 3.5 lbs, 1 teaspoon per pound of meat Diamond Crystal kosher salt
Optional: Make Compound Butter
- Combine softened butter with minced garlic, thyme, rosemary, and flaky sea salt. Mix thoroughly, roll tightly in plastic wrap into a log shape, and refrigerate until firm. This can be made up to 5 days ahead. Slice a half-inch round when ready to use.4 tablespoons unsalted butter, softened to room temperature, 2 cloves fresh garlic, minced, 1 tablespoon fresh thyme leaves, 1 tablespoon fresh rosemary, finely chopped, 1 pinch flaky sea salt
The Low-Temperature Oven Phase
- Preheat your oven to 225°F. Allow at least 20 minutes for the oven to fully stabilize at temperature — home ovens cycle and overshoot on initial heat-up. A pizza stone or baking steel on a lower rack helps buffer temperature swings if you have one.
- Remove the steak from the refrigerator. Insert your probe thermometer into the geometric center of the ribeye eye — not adjacent to the bone, not into a thick fat seam. The probe tip should be equidistant from all surfaces of the eye muscle. Position the steak on the wire rack with the bone pointing away from the oven’s rear heating element or dominant heat source. This is critical: the bone conducts heat slowly and will lag 10°F to 15°F behind the eye muscle during the oven phase. Pointing the bone toward the heat source does not compensate — it creates an uneven cook on the bone-side lobe that persists through the sear.1 tomahawk ribeye, approximately 2.5 inches thick and 2.5 to 3.5 lbs
- Slide the baking sheet into the oven. For a 2.5-inch tomahawk, expect 90 to 110 minutes to reach 115°F internal. Monitor the probe thermometer continuously. Do not open the oven repeatedly — every opening drops the oven temperature by 25°F to 40°F and adds time. Begin checking the probe display at the 80-minute mark. Pull the steak from the oven when the probe reads exactly 115°F.1 tomahawk ribeye, approximately 2.5 inches thick and 2.5 to 3.5 lbs
Prepare for the Sear
- While the steak is in the final 20 minutes of the oven phase, place your cast-iron skillet over the largest burner on your gas range at maximum heat. Allow it to preheat for a full 10 minutes. The pan is ready when a drop of water vaporizes instantly on contact and the surface reads 580°F to 650°F on an infrared thermometer. If using a charcoal grill, light a full chimney of hardwood lump charcoal and allow it to ash over completely, then dump it and position the grate 2 inches above the coals.
- When the steak reaches 115°F and comes out of the oven, pat every surface completely dry with fresh paper towels including the sides and around the bone. Any visible moisture on the surface will create an evaporative cooling buffer that delays Maillard browning by 30 to 60 seconds — enough time for the sear to drive the core temperature past your target. Season with coarsely ground black pepper on all surfaces now. Do not apply pepper earlier in the process as it will char on a 600°F surface if pre-applied during dry brining.1 tomahawk ribeye, approximately 2.5 inches thick and 2.5 to 3.5 lbs, 1 teaspoon coarsely ground black pepper
The High-Temperature Sear
- Add avocado oil or tallow to the screaming-hot cast-iron skillet. It should shimmer and begin to smoke within 5 seconds. Allow it to heat for 10 seconds after adding, then immediately lay the steak flat — eye side down — with the bone angled away from the hottest part of the burner. Press gently on the steak with a spatula or your palm (through a towel) to ensure maximum surface contact with the metal. Do not move the steak.1 tomahawk ribeye, approximately 2.5 inches thick and 2.5 to 3.5 lbs, 1 tablespoon avocado oil or refined beef tallow
- Sear for 60 to 90 seconds on the first side until a deep mahogany crust forms — you will see it creeping up the sides of the steak. Flip once. Sear the second side for 60 to 90 seconds. Using tongs, hold the steak vertically and sear all four sides (edges including the fat cap) for 20 to 30 seconds each. This renders the fat cap and seals the crust on surfaces that would otherwise remain pale. The total active sear time should not exceed 4 minutes — if you need more time than this to develop the crust, your pan was not hot enough at the start.1 tomahawk ribeye, approximately 2.5 inches thick and 2.5 to 3.5 lbs
- Transfer the steak immediately to a clean wire rack set over a cutting board. Do not place it directly on the cutting board — elevating it prevents the crust from steaming and softening on the underside. If using compound butter, place one slice on top of the steak now — the residual crust heat will melt it over the rest period without cooking the butter past its smoke point.1 tomahawk ribeye, approximately 2.5 inches thick and 2.5 to 3.5 lbs, 4 tablespoons unsalted butter, softened to room temperature, 2 cloves fresh garlic, minced, 1 tablespoon fresh thyme leaves, 1 tablespoon fresh rosemary, finely chopped, 1 pinch flaky sea salt
Rest and Serve
- Rest the steak for a minimum of 10 minutes, uncovered. Tenting with foil traps steam and softens the crust you just worked to build — do not tent. During rest, conduction equalizes the steep thermal gradient between the seared exterior and the core. The carryover during this phase is minimal compared to the sear but real — expect the core to rise approximately 3°F to 5°F during the rest.
- To serve: using a boning knife, slice cleanly along the rib bone to free the eye from the bone in one intact piece. Then slice the eye against the grain into half-inch planks. Re-plate the bone alongside the sliced meat for presentation. Finish with a pinch of flaky sea salt over the cut surfaces if desired. The internal temperature at service for a properly executed reverse sear targeting 115°F pull should read 128°F to 132°F — the heart of medium-rare.1 tomahawk ribeye, approximately 2.5 inches thick and 2.5 to 3.5 lbs, 1 teaspoon per pound of meat Diamond Crystal kosher salt
Notes
Nutrition
How do I nail it every time? Tips for the perfect tomahawk
- Bone positioning is mandatory, not optional. During the oven phase, orient the steak so the bone points away from the oven’s rear convection element or dominant heat source. On the sear, keep the bone angled away from the hottest part of the grate. A 15°F thermal lag at the bone-side lobe will show up as a pink-gray band in an otherwise perfect slice.
- Pull at 115°F, not 125°F. The sear is not cosmetic — it is a thermal event. A 60-second sear per side on a 600°F surface drives the outer 3mm of the steak past 165°F and deposits significant heat into the near-surface zone. If you pull the tomahawk at 120°F internal before the sear, you will finish at 130°F to 135°F — fine for medium, but you bought a tomahawk; cook it medium-rare at 130°F final.
- Surface dryness is your crust insurance. Before the sear, pat the steak completely dry with paper towels. Any visible moisture on the surface reintroduces evaporative cooling and delays Maillard onset by 30 to 60 seconds — enough time to overshoot the interior temperature.
- Do not move the steak during the sear. Lateral movement drags the nascent crust across the hot surface and tears the forming protein-fat lattice. Press gently at first contact to maximize surface contact with the hot metal, then leave the steak alone until you flip.
- Rest is non-optional. The thermal gradient from sear to center is steep — the outer millimeters are near 160°F while the core is at 130°F. A 10-minute rest allows conduction to equalize. The juice that runs when you cut a rested steak is dramatically less than from an unrested one; that juice is myofibrillar water carrying rendered fat and dissolved flavor compounds, and losing it to the cutting board is a waste.
- The bone is a serving handle, not a cooking aid. The bone-adjacent meat is always the least uniformly cooked section of a tomahawk. Slice cleanly along the bone with a boning knife before plating for tableside presentation, then re-plate the bone alongside the sliced meat for the visual effect.
What variations work with this method?
Smoked reverse sear: Run the low-temperature phase in a pellet smoker or offset smoker set at 225°F with oak or hickory wood. The slow phase is ideal for smoke penetration — the extended time allows the smoke ring to develop and the volatile phenols (guaiacol, syringol) from combustion to bond to the myoglobin layer in the outer quarter-inch of the meat. The smoke ring is a purely cosmetic indicator of this reaction, but the flavor is real. Pull the steak at 115°F internal and finish on a screaming-hot grate directly over coals. This is the preferred competition-style approach.
Garlic-herb compound butter finish: Blend 4 tablespoons softened unsalted butter with 2 minced garlic cloves, 1 tablespoon fresh thyme, 1 tablespoon fresh rosemary, and a pinch of flaky sea salt. Roll in plastic wrap and refrigerate until firm. Slice a half-inch round and lay it on the resting steak immediately after the sear — the residual heat from the crust melts the compound butter into the meat surface over the rest period without cooking the butter past its smoke point. The fat carries thyme’s thymol and rosemary’s camphor and borneol directly into the crust via lipid-phase partitioning.
Scaling for multiple guests: The reverse sear scales poorly with multiple tomahawks in a standard home oven because the additional thermal mass lowers the ambient oven temperature during the first 20 minutes and significantly extends the time to reach the pull temperature. Add 15 minutes to the expected oven time per additional steak and monitor each steak with its own probe thermometer — no two steaks reach 115°F at the same rate, even if they weighed the same on the scale.
Wagyu or high-marbling tomahawk: USDA Prime and A5 Wagyu tomahawks carry dramatically higher intramuscular fat content. The lower-melting triacylglycerols in heavily marbled Japanese Wagyu mean the fat renders aggressively even in the low oven phase, which can cause the steak to feel greasy rather than buttery if taken past 125°F final. For A5 Wagyu, pull from the oven at 110°F and target a final internal temperature of 125°F to 127°F. A shorter, hotter sear — 45 seconds per side at maximum heat — preserves the distinct mouthfeel of the marbling rather than rendering it out entirely.
Frequently asked questions
Can I reverse sear a tomahawk directly on a gas grill instead of using the oven? Yes, with two conditions. First, you need a grill large enough to run a true two-zone setup — low indirect heat at 225°F on one side and a ripping-hot direct zone on the other. Second, a gas grill in the 225°F indirect zone tends to dry the surface more aggressively than a humid home oven, which is actually advantageous for crust formation. Monitor internal temperature with a probe thermometer and pull at 115°F as written, then move the steak to the direct zone for the sear.
Why cook at 225°F and not 250°F or 275°F to speed things up? Higher oven temperatures compress the thermal gradient between the surface and the core — the outer layers of the steak race ahead of the center, leaving a thicker band of overcooked gray meat around the eye. At 225°F, the gradient is gentle enough that the surface is only 20°F to 30°F warmer than the core at the pull point, yielding a nearly edge-to-edge uniform cook. At 275°F, that gap widens to 40°F to 50°F and the gray band becomes visible. The time savings are roughly 20 minutes; the quality cost is not worth it.
My cast iron is smoking heavily before the steak goes in — is that too hot? A dry cast iron skillet smoking at idle means the surface is somewhere above its seasoning’s smoke point, typically 400°F to 500°F depending on the oil used to season it. That is exactly where you want it. Add a thin film of high-smoke-point oil — avocado oil or tallow — immediately before the steak, let it shimmer for 10 seconds, and then place the steak on the surface. The oil fills the microscopic surface voids in the iron, maximizing metal-to-meat contact and heat transfer efficiency for the crust. Do not add the oil during the preheat or it will polymerize and smoke for the full 10 minutes before you are ready.