Key Takeaways
- Timeless Charm and Efficiency: Weber grills are celebrated for their durability and superior heat retention, making them essential for both seasoned grill masters and beginners alike.
- Essential Equipment: Proper grilling requires specific tools like a clean Weber grill, high-quality charcoal, a chimney starter, long-handled tongs, a meat thermometer, and heat-resistant gloves.
- Pre-Grilling Preparation: Marinating the meat, preparing vegetables, and properly setting up the grill are crucial steps for ensuring a smooth and flavorful grilling experience.
- Optimal Cooking Techniques: Preheat the grill, sear the meat on direct heat and then move it to indirect heat to cook through, ensuring perfectly grilled food every time.
- Post-Grilling Steps: Rest the meat to redistribute the juices, and adding final touches like fresh herbs and a drizzle of olive oil enhances the overall flavor and presentation.
- Serving Suggestions: Elevate your barbecue experience with creative plating, complementary dipping sauces, and well-paired side dishes such as grilled corn, potato salad, and coleslaw.
Required Equipment and Ingredients
Ensure you have all the required equipment and ingredients before you begin cooking on your Weber grill. Proper preparation will make your grilling experience enjoyable and efficient.
Grill Setup
- Weber Grill: The star of the show. Ensure it’s clean and in good working condition.
- Charcoal: For charcoal grills. Choose high-quality briquettes or lump charcoal.
- Chimney Starter: Essential for easily igniting your charcoal without chemicals.
- Grill Grate: Make sure it’s clean and free of debris for the best cooking results.
- Grill Tongs: Long-handled tongs to handle food safely over the grill.
- Spatula: A sturdy, wide spatula for flipping burgers and other delicate items.
- Meat Thermometer: For checking the internal temperature of your meats.
- Basting Brush: Useful for applying marinades and sauces.
- Grill Brush: Keep your grill grate clean to ensure even heat distribution.
- Heat-Resistant Gloves: Protect your hands from the high temperatures of the grill.
- Steaks: Choose cuts like ribeye, sirloin, or T-bone; ensure they’re well-marbled for juiciness.
- Burgers: Ground beef with at least 20% fat content for juicy, flavorful burgers.
- Chicken Breasts/Thighs: Marinated or seasoned as per your preference.
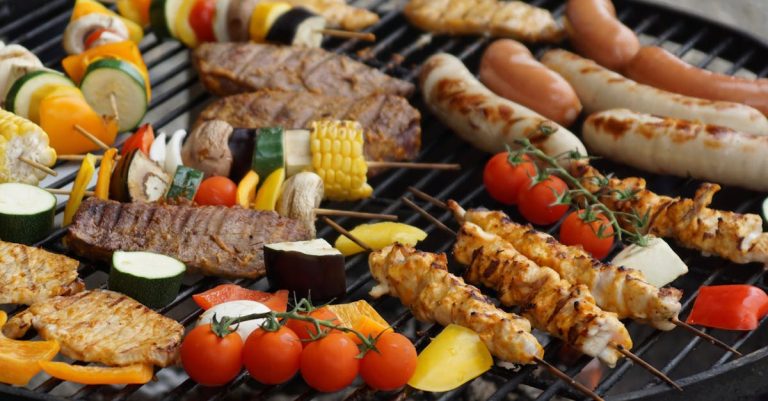
- Vegetables: Bell peppers, onions, zucchini, and mushrooms, cut into grill-friendly sizes.
- Salt and Pepper: Basic seasonings to enhance the natural flavors of your meats and vegetables.
- Olive Oil: For brushing on vegetables and meat to prevent sticking and add flavor.
- Marinades and Sauces: Your favorite barbecue sauce, teriyaki, or a homemade marinade.
- Herbs and Spices: Additional flavorings like garlic powder, paprika, and fresh herbs.
- Buns: For burgers, select good-quality buns that can hold up to grilling.
- Cheese: Options like cheddar, Swiss, or blue cheese for topping your burgers.
Having this equipment and these ingredients at the ready will set you up for a successful and enjoyable grilling session on your Weber grill.
Pre-Grilling Preparation

Ensuring a smooth and flavorful grilling experience requires careful preparation. Follow these steps to get ready for a perfect cook on your Weber grill.
Marinating the Meat
Marinating infuses your meat with deep flavors. Begin by selecting your favorite marinade recipe or use a store-bought option. Place your meat—whether it’s steak, chicken, or pork—in a large zip-lock bag or shallow dish. Pour the marinade over the meat, making sure all surfaces are coated. Seal the bag or cover the dish and refrigerate for at least 1-2 hours or overnight for more intense flavor.
Ingredients:
- 2 pounds of meat (steak, chicken, or pork)
- 1 cup of marinade
Preparing Vegetables
Fresh vegetables add color and nutrition to your grill menu. Start by washing all your veggies thoroughly. Cut them into even-sized pieces to ensure uniform cooking. If you’re using harder vegetables like potatoes or carrots, consider parboiling them before grilling. Place the cut vegetables in a bowl, drizzle with olive oil, and season with salt, pepper, and your favorite herbs. Toss to coat evenly. For added flavor, you can marinate them like the meat.
Ingredients:
- 2 cups of mixed vegetables (bell peppers, zucchini, onions, etc.)
- 2 tablespoons olive oil
- Salt and pepper to taste
- Optional: herbs like rosemary, thyme, or oregano
Prepping the Grill
A well-prepped grill is crucial for an efficient cooking process. Start by cleaning the grill grates using a grill brush to remove any residue from previous uses. For a charcoal Weber grill, fill the chimney starter with charcoal and light it. Once the coals are ashed over, spread them evenly on the charcoal grate. For a gas Weber grill, preheat by turning all burners to high and closing the lid for about 10-15 minutes. After preheating, adjust the heat as required for your recipes—medium-high for direct grilling or medium-low for indirect grilling. Don’t forget to oil the grates lightly to prevent sticking.
Equipment:
- Grill brush
- Charcoal or propane
- Chimney starter (for charcoal grills)
- Oil for grates
By following these pre-grilling preparation steps, you’ll be ready to enjoy a seamless and flavorful grilling experience on your Weber grill.
Grilling Instructions

Now that your Weber grill is prepped and ready, it’s time to fire it up and get grilling. Follow these detailed steps to achieve perfectly grilled meat and vegetables.
Lighting the Weber Grill
- Charcoal Grill: Use a chimney starter to light your charcoal. Fill the chimney with charcoal briquettes and place crumpled newspaper or a few fire starters underneath. Light it using a long match or lighter. Let the charcoal burn until they’re covered with a white ash, about 10-15 minutes.
- Gas Grill: Ensure all burner controls are off. Open the lid and turn the gas supply on at the tank. Light the grill by turning the knob on one burner and pressing the ignition button. Adjust the burners to the desired heat level.
Cooking Meat
- Preheat the Grill: Preheat your Weber grill for 10-15 minutes to ensure it reaches the optimal temperature for grilling meat.
- Sear the Meat: Place your meat on the hot, direct heat area of the grill. Sear it for about 2-3 minutes on each side to develop a crust and lock in the flavors.
- Move to Indirect Heat: After searing, move the meat to the cooler side of the grill to cook through without burning. Use a meat thermometer to check for the desired doneness:
| Meat | Internal Temperature (°F) |
|——|—————–|
| Beef | 125-135 (Medium Rare) |
| Chicken | 165 |
| Pork | 145 | - Rest the Meat: Once done, remove the meat from the grill and let it rest for at least 5 minutes. This allows the juices to redistribute, making for a juicier bite.
- Prepare the Vegetables: Wash and cut your vegetables into uniform sizes for even cooking. Toss them with olive oil, salt, and pepper.
- Use a Grill Basket or Skewers: For smaller vegetables like cherry tomatoes or sliced peppers, use a grill basket or skewers to prevent them from falling through the grates.
- Grill Over Direct Heat: Place the vegetables over direct medium heat. Grill them for 3-5 minutes on each side or until they are tender and have nice grill marks.
By following these steps, you’ll master the art of grilling with your Weber grill, creating savory, perfectly cooked meat and vegetables every time.
Post-Grilling Steps
Congratulations! You’ve achieved perfectly grilled meat and vegetables with your Weber grill. Now, let’s focus on the essential post-grilling steps to ensure your dishes reach their full potential.
Resting the Meat
Resting meat after grilling is crucial. Transfer the meat from the grill to a cutting board. Tent it loosely with aluminum foil, and let it rest for about 10 minutes. This allows the juices to redistribute throughout the meat, ensuring tenderness and flavor in every bite.
Final Touches
Before serving, add the final touches to elevate your dish. Sprinkle fresh herbs like parsley, cilantro, or basil over the meat and vegetables. Drizzle a bit of olive oil or a squeeze of fresh lemon juice to enhance the flavors. Don’t forget to garnish with a pinch of sea salt and freshly ground black pepper for a perfect finish.
Serving Suggestions
Impress your guests with not just perfectly grilled food but also with how you serve it. Here are some creative and delicious ways to elevate your presentation using your Weber grill.
Plating
When it comes to plating your grilled meats and vegetables, presentation is key. Start by slicing your rested meats against the grain to keep them tender and juicy. Arrange the slices uniformly on a large serving platter. For vegetables, place them in small, even clusters alongside the meat to create a balanced visual appeal.
- Garnish: Fresh herbs like parsley, cilantro, or basil not only add a pop of color but also an aromatic note. Sprinkle them generously over your grilled items.
- Sauces: Serve your grilled dishes with a variety of dipping sauces. Chimichurri, barbecue sauce, or a spicy aioli can complement different meat and vegetable flavors.
- Serving Platters: Use wooden or slate boards to serve your grilled items. These natural materials enhance the rustic, gourmet feel of your presentation.
Side Dishes
Pairing your grilled masterpieces with the right side dishes can turn a good meal into an exceptional one. Consider these delightful options:
- Grilled Corn on the Cob: Add some flavor by brushing the corn with a mixture of butter, garlic, and lime juice then grill until slightly charred.
- Potato Salad: Opt for a classic potato salad with a tangy mustard dressing or go for a grilled potato salad to keep the grill theme consistent.
- Coleslaw: A refreshing coleslaw with a zesty vinegar-based dressing can balance the rich flavors of your grilled meats and veggies.
- Grilled Bread: Toast slices of rustic bread on the grill. Rub them with garlic and drizzle with olive oil for the perfect accompaniment to your main dishes.
- Fruit Salad: A light and fresh fruit salad with seasonal fruits can offer a sweet contrast to the savory grilled flavors.
Use these suggestions to make your next barbecue not just a meal, but an unforgettable experience.
How Does the Two-Zone Grilling Method Enhance Steak Cooking on a Weber Grill?
The two-zone grilling method ensures optimal control over cooking temperatures, allowing you to achieve a flavorful sear and tender, juicy steak. By dividing your Weber Grill into direct and indirect heat zones, you can cook a perfect twozone grilled steak with consistent results, combining charred crusts and mouthwatering texture effortlessly.
Conclusion
The Weber grill isn’t just a cooking tool; it’s an experience that transforms your backyard into a gourmet haven. By following the right preparation and grilling techniques, you can create dishes that impress and delight. Whether you’re searing meat or grilling vegetables, the Weber grill ensures every bite is flavorful and perfectly cooked. Pair your grilled masterpieces with complementary sides, and you’ll elevate any barbecue into an unforgettable feast. So, fire up your Weber grill and get ready to enjoy the art of grilling like never before.
Frequently Asked Questions
What makes Weber grills stand out from other grills?
Weber grills are known for their durability, excellent heat retention, and ability to cook food evenly. These features help create perfect grilling results and memorable culinary moments. Weber grills also offer a wide range of models to suit various cooking styles, from classic charcoal grills to high-tech gas and pellet options. For those looking to elevate their barbecuing game, following perfect outdoor cooking tips can make all the difference in achieving juicy meats and flavorful vegetables. With the right techniques and a reliable grill, outdoor gatherings become even more enjoyable and stress-free.
How should I prepare meat before grilling on a Weber grill?
Before grilling, marinate the meat to enhance its flavor and tenderness. Allow it to sit in the marinade for the recommended time to properly absorb the flavors.
What are the steps for pre-grilling preparation on a Weber grill?
Pre-grilling steps include marinating meat, preparing vegetables, and ensuring that the grill is clean and prepped with essential equipment like tongs, brushes, and a thermometer.
How do you light and preheat a Weber grill for cooking?
To light a Weber grill, follow the manufacturer’s instructions for your specific model. Make sure to preheat the grill on high for about 10-15 minutes before lowering the heat to the desired cooking temperature.
What is the best way to achieve perfectly grilled meat and vegetables?
For the best results, sear the meat on high heat first, then cook it over direct and indirect heat according to the recipe. Vegetables should be grilled until tender and have a slight char.
Why is it important to rest meat after grilling?
Resting meat allows the juices to redistribute throughout the meat, resulting in a more tender and flavorful dish. Let the meat rest for a few minutes before slicing and serving.
What final touches can I add to my grilled dishes?
Add fresh herbs, a drizzle of olive oil, a squeeze of lemon juice, and season with sea salt and black pepper before serving to enhance the flavors of your grilled dishes.
What are some side dishes that pair well with grilled food?
Consider serving grilled dishes with sides like grilled corn on the cob, potato salad, coleslaw, grilled bread, and fruit salad to create a complete and satisfying dining experience.
How can I impress guests with my presentation of grilled dishes?
Use creative plating, garnish with fresh herbs or edible flowers, add sauces, and serve on stylish platters to make your grilled dishes visually appealing and impressive.